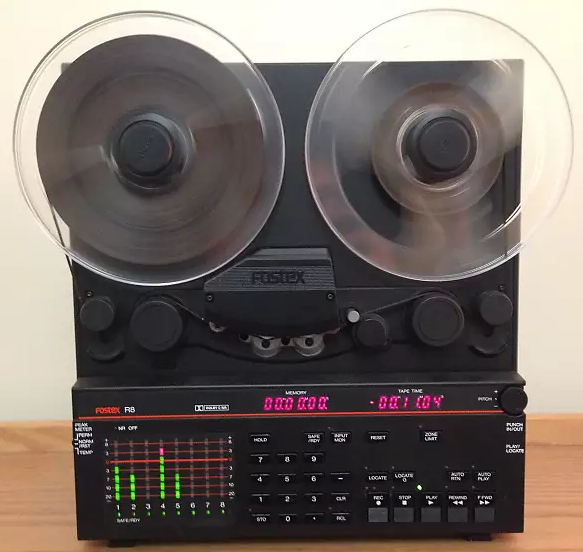
So I could purchase a Fostex R8 cheap. The unit was supposed to be in a fairly good working condition, maybe a few scratches on the front. The price was that good that I could not walk away from it. Besides, I always wanted a Fostex. Just because.
Overview
This deck is squeezing 8 audio tracks onto a standard 1/4 inch tape. To put that into perspective, normal home audio deck use 4 tracks (2 -> and 2 <-) and the professional world uses just 2 tracks onto that same width of tape. So the tracks are super small. To compensate for the loss of fidelity and the added tape hiss the speed at which the tape runs is fixed at 38 cm/s or 15 IPS (cassettedecks run at 4,75 cm/s). Also, the deck has Dolby C. Dolby C comes from the cassette world, it is an enhanced version of the omnipresent dolby B and it works quite well on this deck. But I’m getting ahead of myself.
The deck, being one of the very latest generation of tape deck being made, is heavily computerized. Not for the calibration electronics, like the Studer A810 and all Studer models beyond that, but in the controls. There are a LOT of possibilities and functions that I have not even tried tried yet.
When the deck is turned on, the display shows a scrolling text of ‘FOSTEX’.
First impressions
When I got the deck I first cleaned the outside. I like to work on a clean deck. This one was not dirty, but sometimes you can get a lot of dirt off decks you collect. After that, I cleaned the heads and the tape path in general. I noticed the very plasticy rollers and the flimsy arms. Also, the roller covers were coming of way too easy. Hmmm, not so good.
I put a tape on and the deck played. So far, so good. Rewind, fast forward, no problem. The capstan was noisy however. I played around with it and decided to try recording. I was NOT disappointed with the sound quality. I was surprised how well it sounded on playback. I tried several channels and it seemed ok. The dolby C noise reduction really took away tape hiss in quiet passages and in between tracks. Just like on cassette decks.
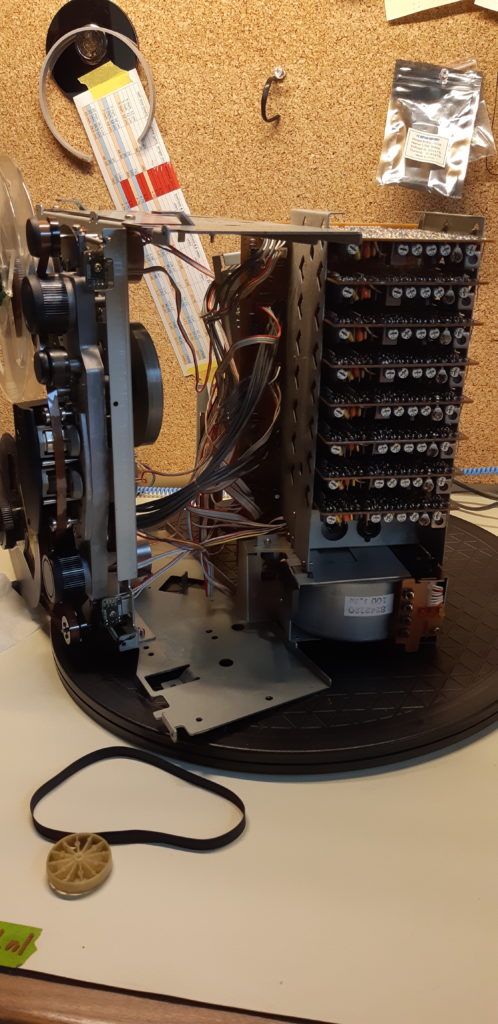
Capstan wheel
After a while I noticed that the tape speed was dropping a little. It was ok after a while, but just after hitting PLAY it was not good.
And after a little more testing, the tape was not moving at all anymore. Even pressing the pinchroller to the capstan did not work. I noticed the capstan was not spinning anymore. When in STOP, the capstan would slowly start spinning again. Only to come to a quick stop once I pressed PLAY. But I could hear the capstan motor spinning constantly. Weird.
I had already ordered a new capstan belt, as is almost always necessary when old rubber belts are involved, so once that had arrived I put it on. But, unfortunately, that was not a solution. I found out that the wheel attached to the capstan motor shaft was slipping. It is a simple plastic wheel that had come loose from the shaft, probably because it had worked itself loose after being clamped on in the past. But now the wheel was just stationary and the shaft of the motor was spinning because of too much room inside. (blowfly pun intended)
Tascamninja to the rescue
I tried to glue the wheel to the shaft a couple of times using instant glue and some stuff that had worked great in the bathroom glueing shelves, but after a short while the wheel came loose again. I had to bite the bullet and order a replacement wheel made out of metal from the website https://www.tascamninja.com/.
I could not play any tape, or do some more tinkering while waiting for the arrival of the metal wheel, because the slippage was such that the capstan did not move at all anymore.
It arrived in about 2 weeks time, and as soon as I put it on, the tape speed was super reliable and super constant. Very happy with this solution!
recapping audio cards
I did do something in the meantime however. I recapped some of the audio boards. Although this deck is one of the last reel to reel decks to be made, it still has 40 year old capacitors in it, so the cards could use some fresh ones. But first, I had to get these cards out. Noone on the internet that I found managed to get them out, or, at least, did not mentioned it at all. Also the manual and the Service Manual had no mention of this removal. I was beginning to suspect that maybe they weren’t supposed to be removed.
But, eventually I managed to pry them out. They are just on connectors on a backplane, so definately supposed to be removed..
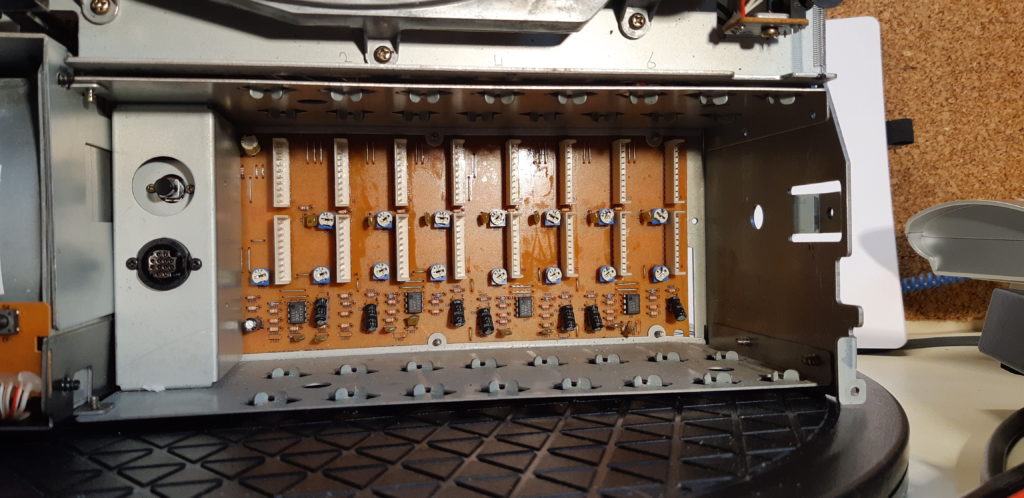
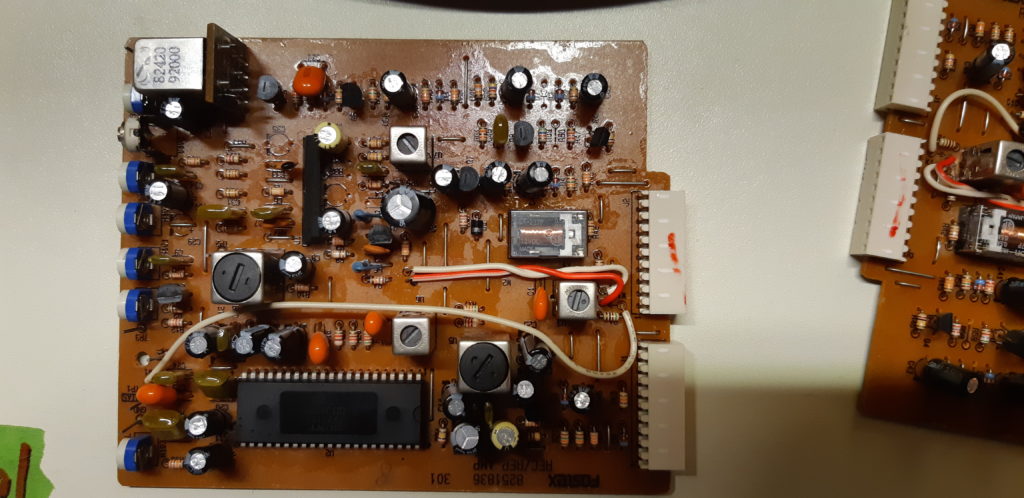
Knowing that I had to recap 8 boards, I made a document to use as a Quick Reference Guide with some handy info on the location of the caps and their value, the location of the pots for calibration, and the complete summary of the calibration procedure. I made it along the way as I worked on the deck.
The document is available at my site at: https://www.reeltoreel.nl/QRG/
You can find the latest version there.
After recapping I started to go through the calibration procedure. It is very labour intensive, doing everything 8 times, but the 0-locate-and-auto-play function of the Fostex is a very handy feature. But then I found an even better feature: you can repeat a section of the calibration tape endlessly. To achieve that, do the following:
– press CLR
– type timecode of beginning, like 0000 and press STO and then the number of the position slot you wish, like 1
– press CLR
– type timecode of end of the fragment, like 29 and press STO and then the number of the position slot you wish, like 2
– press CLR
– type ‘1-2’ and STO. display shows 2-1.
– make sure you play the section and the deck will automatically repeat the section.
I type this from memory so I hope this is correct 🙂
Testing after calibrating
I tested the sound quality when I was done and it sounds very good!
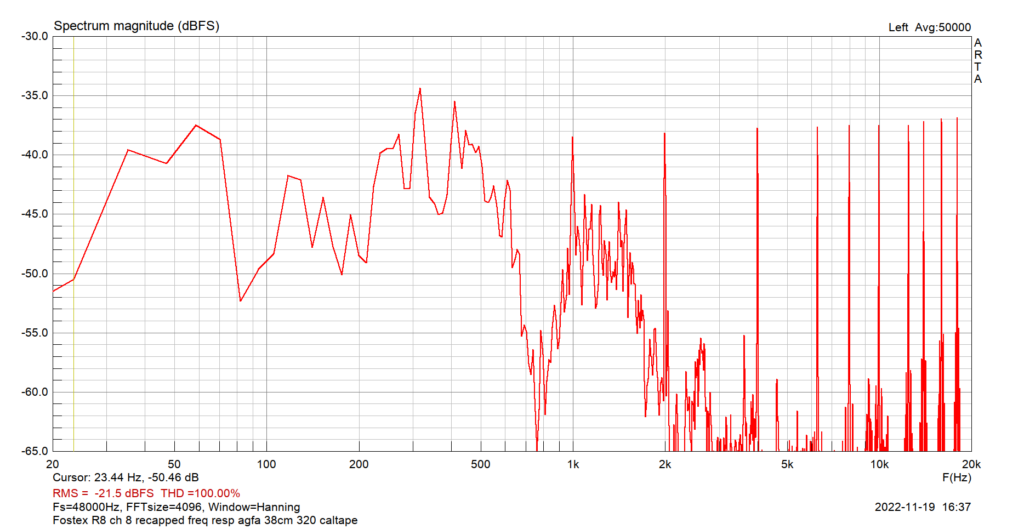
This is a sample from playing the calibration tape. But recording a sweep to 18kHz resulted in an equally straight frequency responce! (I forgot to take screenshots)
I recorded a youtube video where you can listen to a sample. You can find it here:
https://youtu.be/W2jRQmiAHzQ
TO BE CONTINUED
Hoi, wat een leuk verslag. Is er nog een actuele link naar het document? Gr
Hoi, ik heb de URL aangepast.
I fixed the URL.
-Philip.