Category Archives: Audio

A Quadraphonic Akai 1730D-SS

My new addition to the collection is already a few months old, but here is the blogpost anyway.

It is an AKAI 1730D-SS Quadraphonic tape deck that I received from the first owner.

[picture shamelessly stolen from the internet]

When picking it up I tested the deck and only 2 of the 4 channels worked. Only the REAR. Strange. And one of those 2 channels failed intermittently.  When I got home I opened up the deck and had a look at it. I put on one of the many quadraphonic tapes that came with the deck. Quickly I found out that cleaning and fixing the 2ch-4ch switch solved that problem. That was easy.

But the FRONT channels still did not work. At all. No sound, no noise, no click when the deck was powered up, no nothing. I sure hope the playback amp hasn’t died. It appeared there are 4 audioprints in the machine, see picture. At the left of the picture you see the 2 playback prints, at the right the record prints. Each print is stereo. FRONT at the top, REAR at the bottom.


[picture showing the 2 right audio prints removed from their slots]

By turning the pot on the prints I found out wich print was unresponsive (I am going to recalibrate it anyway, so that did not matter). I took it out of its slot for further inspection.


Unfortunately I could not find anything wrong with the print or the components. No burned components, fused caps, burn marks, loose contacts, nothing. I was beginning to feel that I was reaching the end of my knowledge because I have not got expert knowledge of electronics.

When I was going to put the print back into its slot, I noticed something odd about the slot. The slot is a kind of very crude ISA-style slot type, like in the first IBM PC. I saw that the plastic of the slot was broken! That caused the print to not make good contact with the pins in the slot. See the pictures.


When I carefully with my hand pressed the slot so that the print made contact, everything started working! Eureka! ‘There, I found it.’ 

Now how to fix it. Glueing was no option. I soon thought of a tight tie-wrap, that might do the trick. I pulled the tie-wrap as tight as I could. See the pictures.


Then came the next issue. The deck did not want to record at all. I soon found out that the other slots were damaged too (duh). So another set of tie-wraps to the rescue. I put tie-wraps around everything and reconnected it all.

It worked ok, but not reliable. Even when just looking at the recorderprints weird effects on the signal were noticable. First I doubted my tie-wraps, but that solution DID work reliably at the playback prints. Just to be sure I sanded the contacts on the prints and voilá: everything worked flawlessly! So I put the print in and secured them thoroughly. ‘There, I fixed it again’

This is a machine from the early seventies, that has been idle for who knows how long, and I’m surprised at the audio quality.

Now I need to demag it, and calibrate it. Then it will probably sound even better!

[edit]
Although it sounded good at first hearing, further test revealed there was noise in the left front channel ,even when it was not playing. Same on the right rear.

So I replaced the 2sc458 transistors on all the audio prints. After that, I eagerly turned on the machine.

No signal at all!

Remember that I am only doing this as a hobby, I am not a professional guy and I know very little about electronics.

Searching and searching and searching again I found out that the new transistors I had ordered, had a different pin-out than the ones that came of the print. I had put the new ones in with the same orientation as the old ones, that seemed logical but that was incorrect. :) They simply needed to be turned around, so that was relatively simple. I did not need to cross their legs.

After that it worked again, fortunately! Apparently these guys can withstand some rough handling haha. And the best part is, that the deck is silent again now, the noise is gone. I recalibrated it and it sound great!

8 thoughts on “A Quadraphonic Akai 1730D-SS

  1. Mich D. White

    Hey there! I just recently got one of these decks myself, and my problems match your exactly. How do I clean the 2-track 4-track switch? Much appreciated. Great blog!

    Reply
      1. Mich D. White

        Thanks! It seems like there is a short somewhere, and isn’t a dirty switch issue. Front left is working great, with no luck on the other three tracks so far. Just intermittent functionality…

        Reply
          1. Mich D. White

            Nah, my contacts were all nice and solid. It did look like some coffee or something had been splashed on the front panel and then got into the machine. Right now I have gotten both Front and Rear Left channels to work but no luck with the right channels, which is ok for my intents and purposes in my home studio. I just panel the F-L to the left and R-L to the right when I record.

            Thanks for the speedy reply and useful post, I’ll be bookmarking this blog!

          2. Mich D. White

            Nah, my contacts were all nice and solid. It did look like some coffee or something had been splashed on the front panel and then got into the machine. Right now I have gotten both Front and Rear Left channels to work but no luck with the right channels, which is ok for my intents and purposes in my home studio. I just pan the F-L to the left and R-L to the right when I record.

            Thanks for the speedy reply and useful post, I’ll be bookmarking this blog!

  2. fast proxy list

    Hi,I log on to your blog named “A Quadraphonic Akai 1730D-SS | Tapehead” regularly.Your humoristic style is awesome, keep doing what you’re doing! And you can look our website about fast proxy list.

    Reply
  3. George Snell

    Thanks to the great read! I have had one of these bought used in the mid 90’s. It has goon through periods of heavy use and years of no use at all, just setting in the closet unplugged. a few months back, dug it out and put it back in use. After a couple of sessions of radically varied tape speeds, all the dust got out and working great. Only thing ever done to it as been demagnetize the tape heads and replace the pinch wheel on the front. Also have a Teac X-3r. That one has been areal pain, with having to replace the mainboard and tons of switch corrosion problems. I now use both, but really like the Akai and have it as the main tape deck.

    Reply

Leave a Reply

Your email address will not be published. Required fields are marked *

A problematic Teac X-2000R

2014-03-31 18.59.39

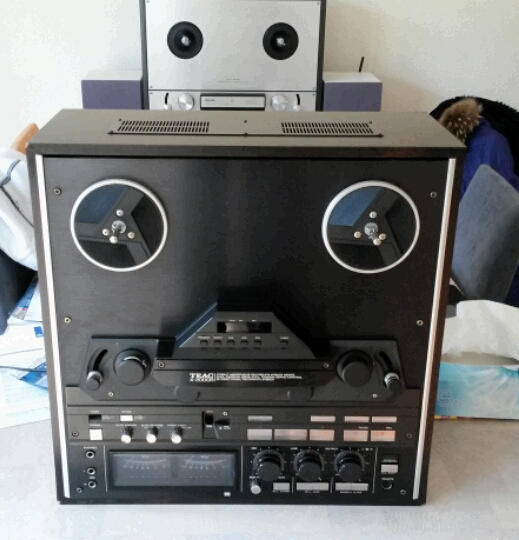
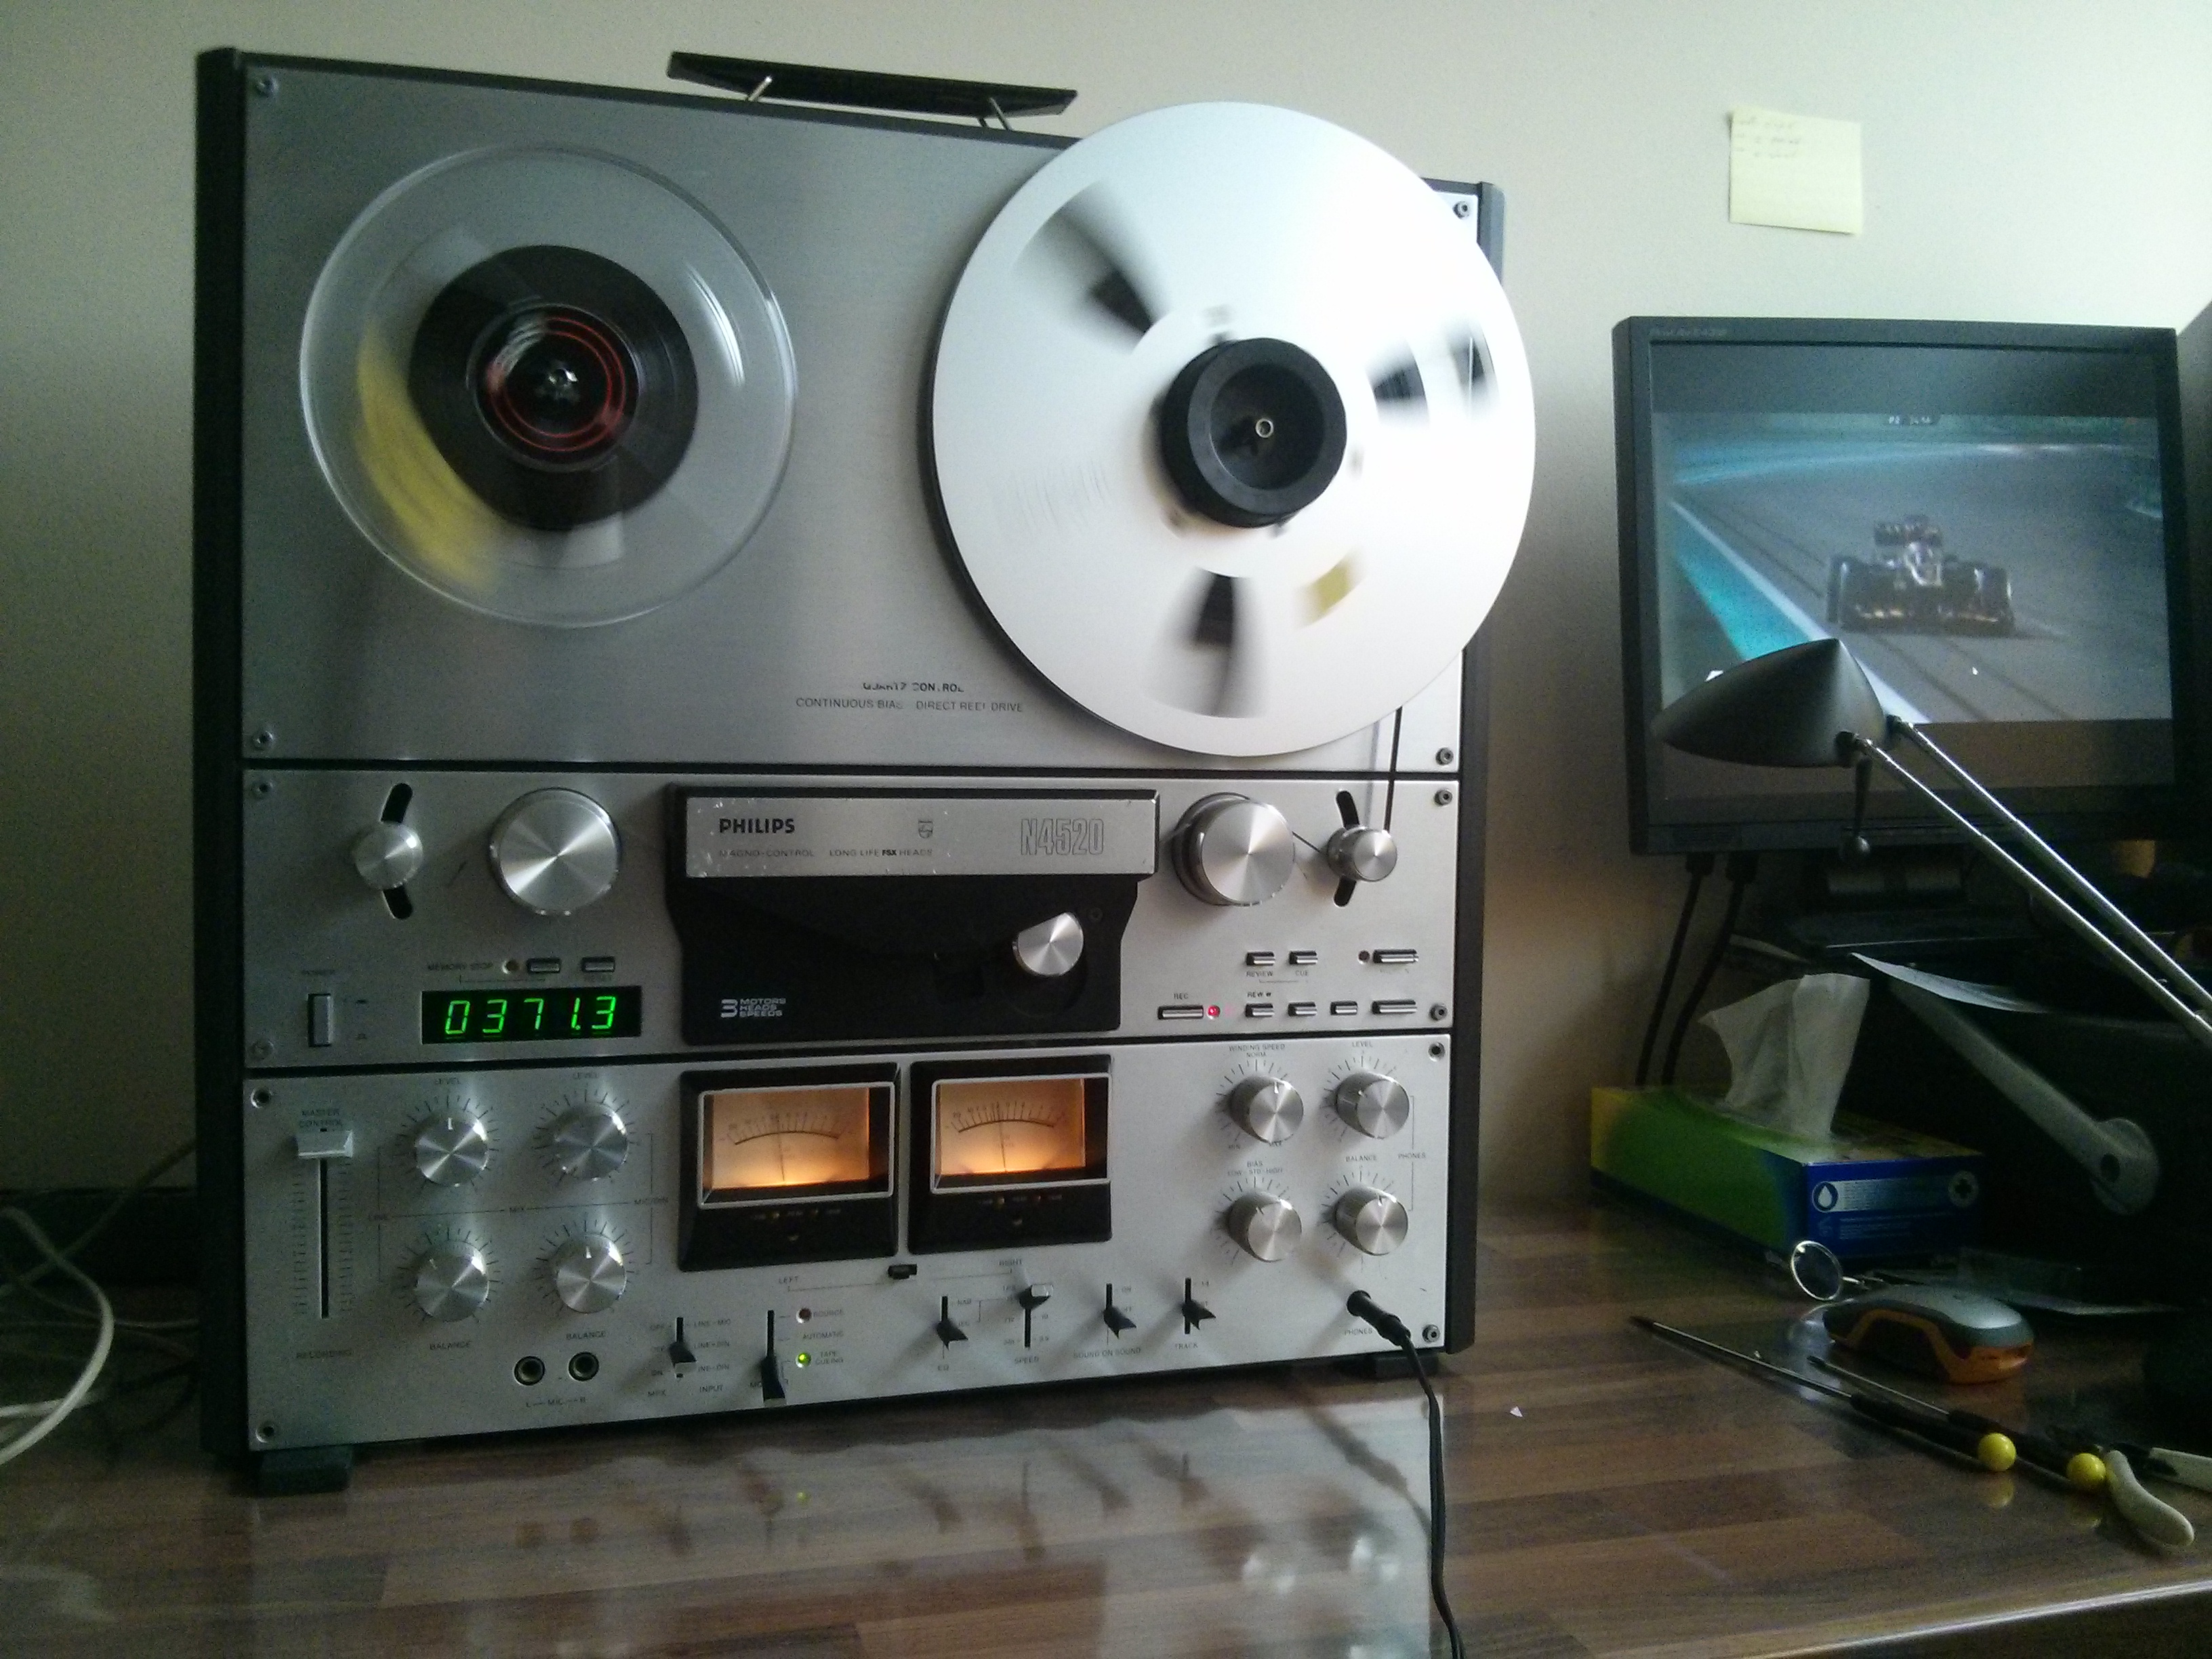
Recently I obtained, for a fair price, a Teac X-2000R. It is a stereo reverse deck, with 6 heads, which means it will record also in reverse. It has dbx built-in, and it can use (chromium) EE tape. A digital counter in hours, minutes and seconds and bias fine tuning on the front panel is also provided. It has 9,5 and 19 cm/s speeds.

Dual capstan

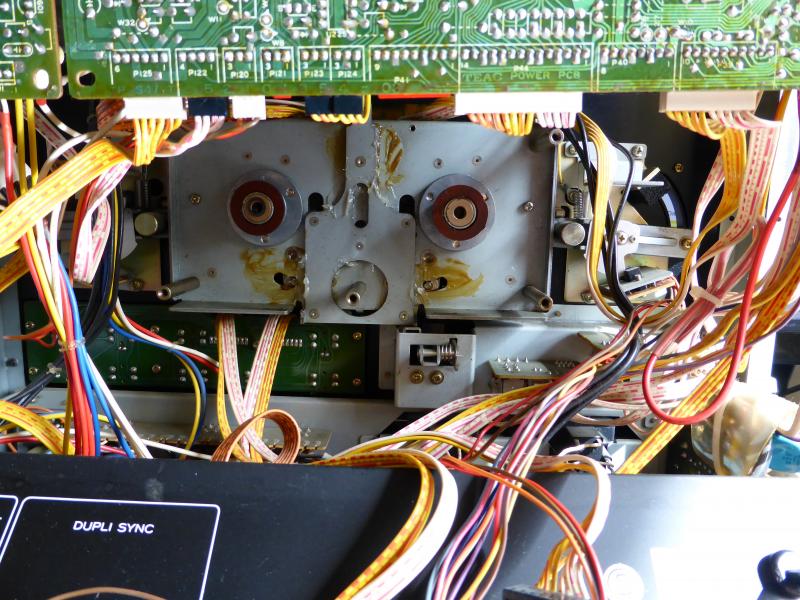
Another prominent feature that is has, however proved to be a very problematic one. The deck is equipped with 2 capstans. This feature was introduced into the later tape deck models, almost towoards the end of the tapedeck-era, to further improve tape-head contact and wow&flutter. These assumptions are correct, and they work well when the deck is in new condition and everything is well calibrated and up to specifications.

On this deck however, things were not new and not up to specs. The dual capstan design is a challenge in itself, but things are further complicated by the fact that it has to function in reverse as well. On this unit that is accomplished by a belt that ‘travels’ across different parts of the flywheel that varies in diameter.

Problems

After the initial cleaning, optical and technical/mechanical, it soon became apparent that the tape handling was not up to par. Sometimes the tape would ‘run away’ from the heads a bit, resulting in loss of audio or worse: tape jam. Things were even worse when playing in reverse. I soon found out (through the service manual) that there were adjustments to be made to the tape tension.

Tape tension

But the increased tape tension was not the solution. When it was ok in forward play, it was bad in reverse. Or vice versa. Or it differed when loading large reels (26 cm) compared to 18 cm reels. Or it was different with different brands of tape. And that wasn’t even reproducible across sessions. And the next day it would be different again.

Solution

Of course the first thing I did was to change the belt. I have a blog of that action, but it is in dutch. So here it is, sorry only in dutch:

====== BEGIN OF DUTCH TEXT ======

Nou, de siem-snaar was snel binnen, en vanochtend was het toch regenachtig, dus aan de slag gegaan met het vervangen van de Teac X-2000R snaar.

Ik heb de uitbouw gedaan volgens de foto’s in deze thread, daar heb ik heel veel aan gehad:

http://www.audiokarma.org/forums/showthread.php?t=59729


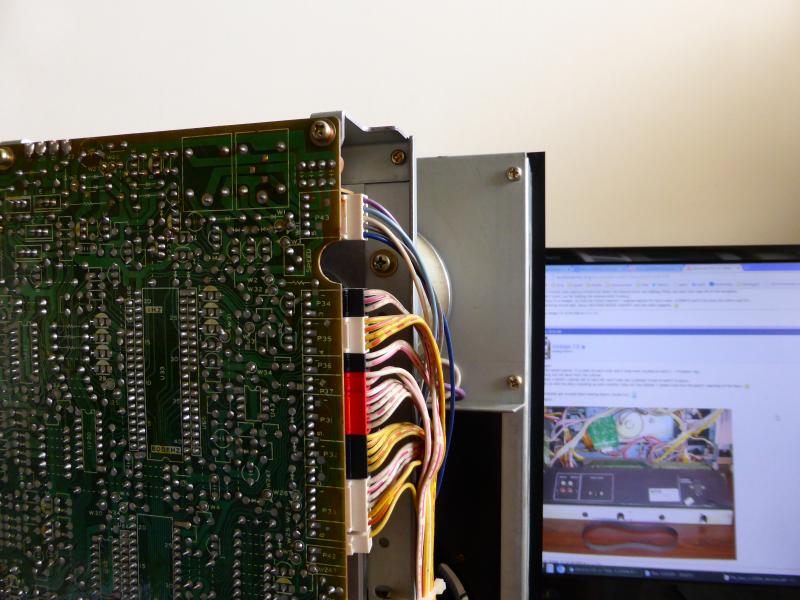
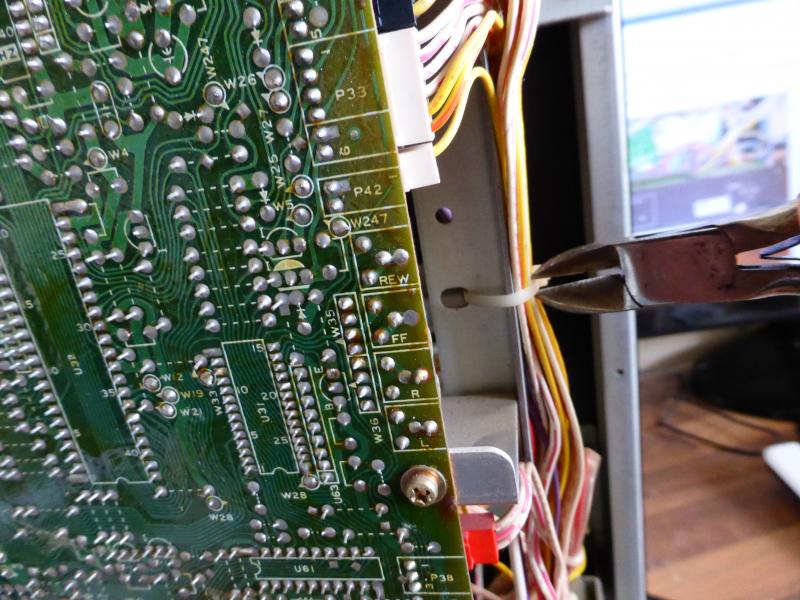
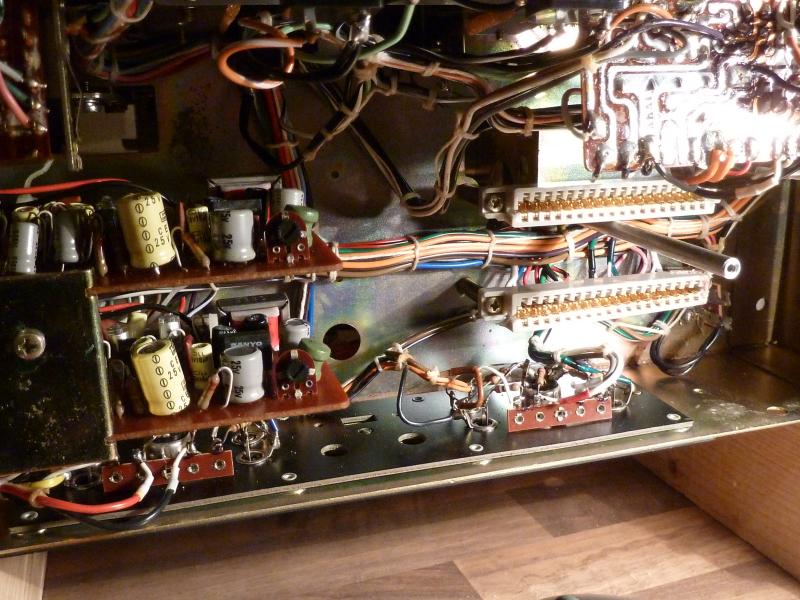
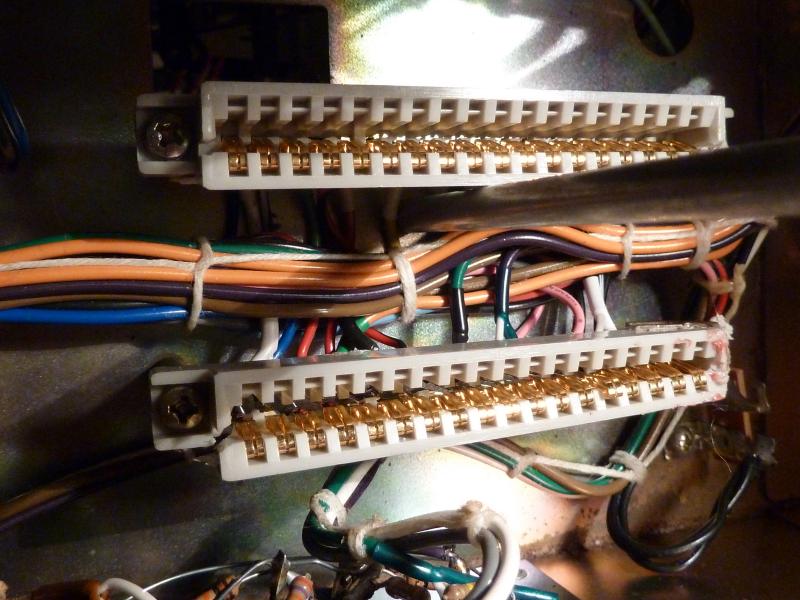
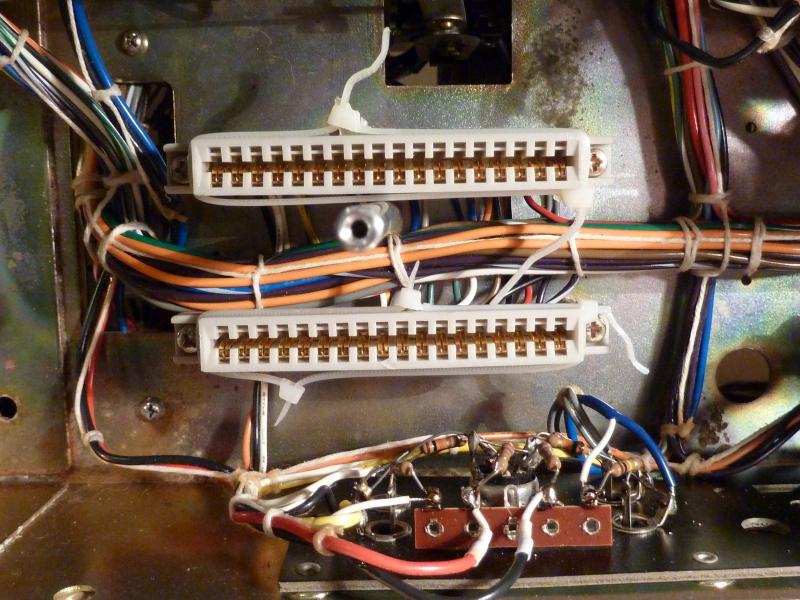
Daar wordt behandeld een X-1000R, en die blijkt toch niet helemaal hetzelfde van binnen. Ik kwam meteen al een grote print tegen die in de weg zat, deze is er niet in een X-1000.
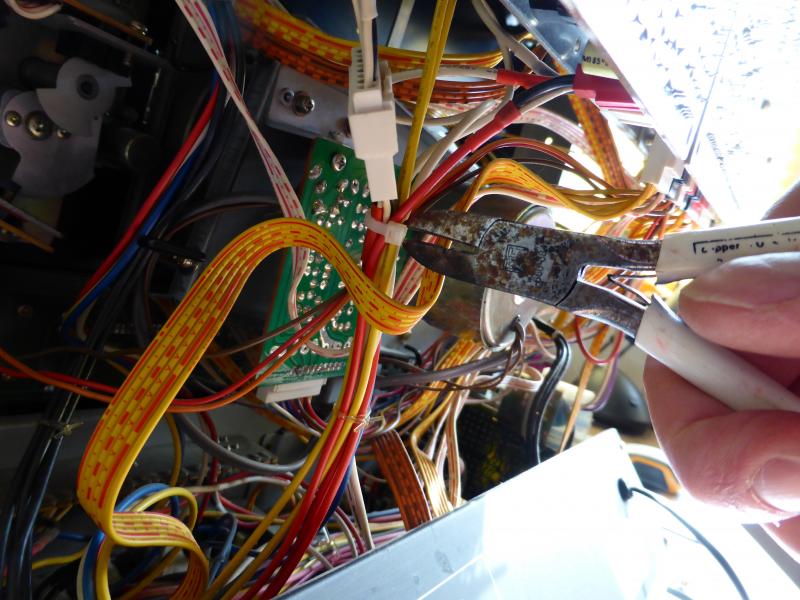
Hierdoor kon ik niet bij de bovenste schroeven komen van de plaat waar de capstanmotor op vast zit. De print moest dus los en daarna omhoog gelift worden, er zitten helaas te veel kabels aan vast om hem compleet uit de weg te krijgen.


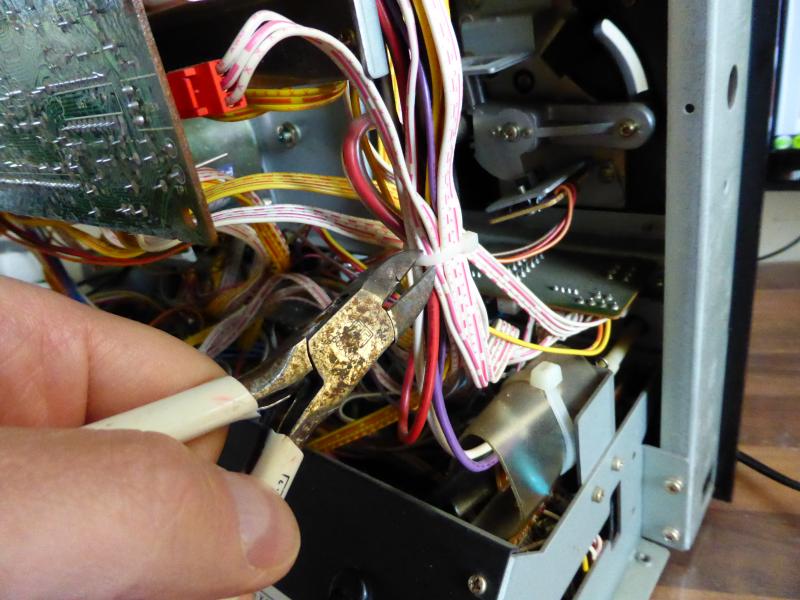
Na wat kabelbomen losgeknipt te hebben, kon ik de print opbeuren en omhooghouden met een plakbandrol.


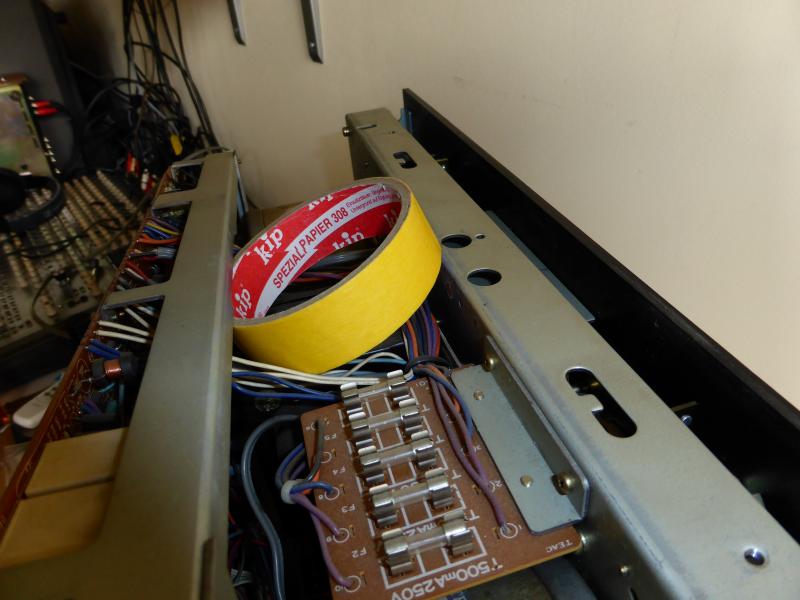
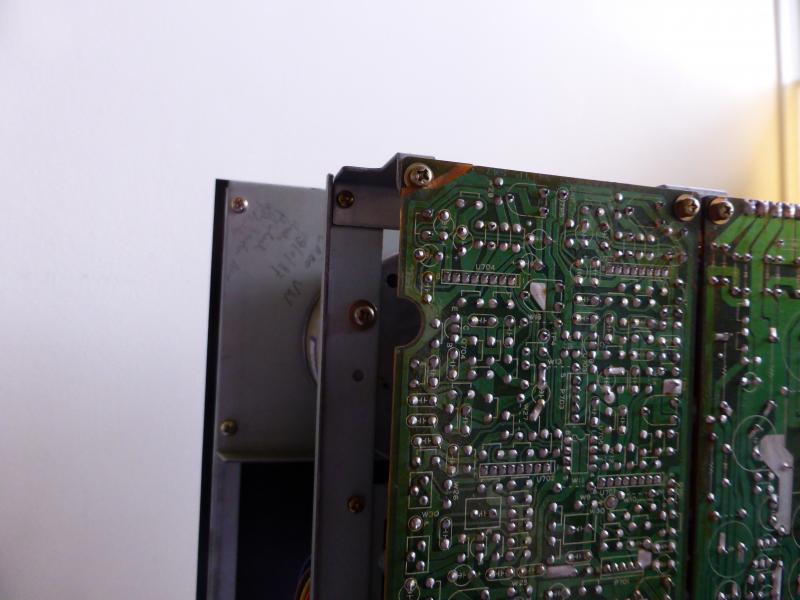
Hierna kon ik er wel goed bij.


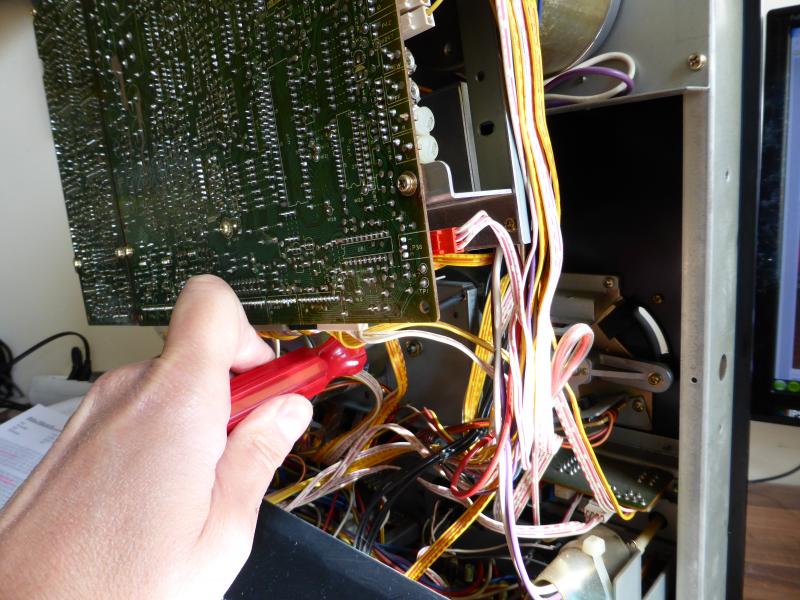
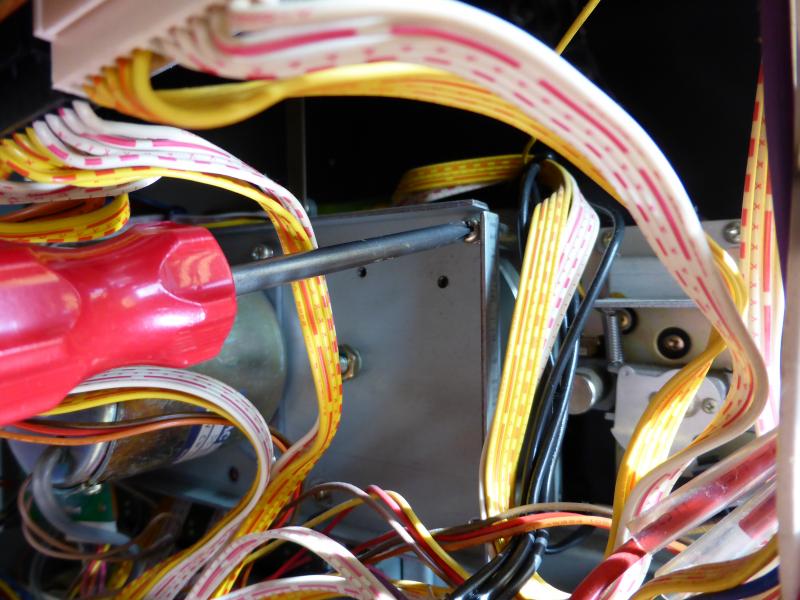
Nog even de plaat losknippen van de motor zelf:


Er zitten alsnog wat kabels in de weg, maar die zitten gelukkig vast met connectoren. Loshalen die hap dus.


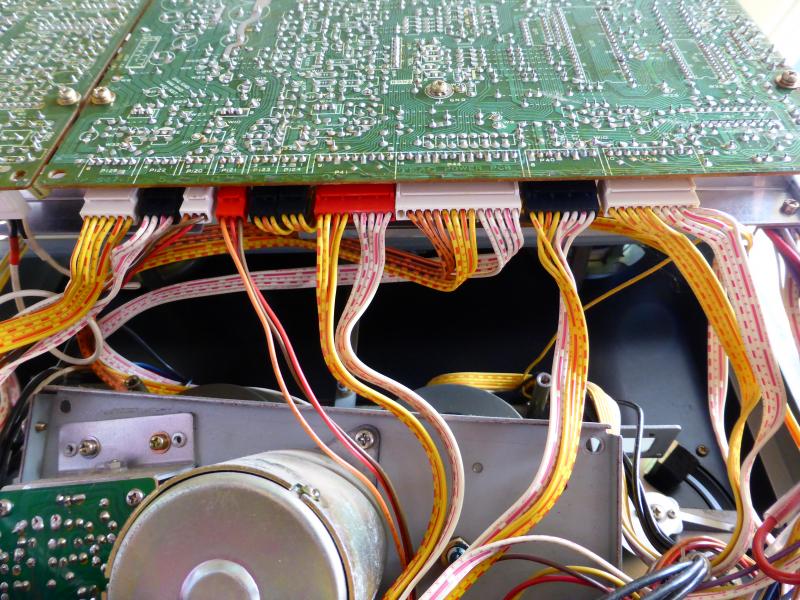
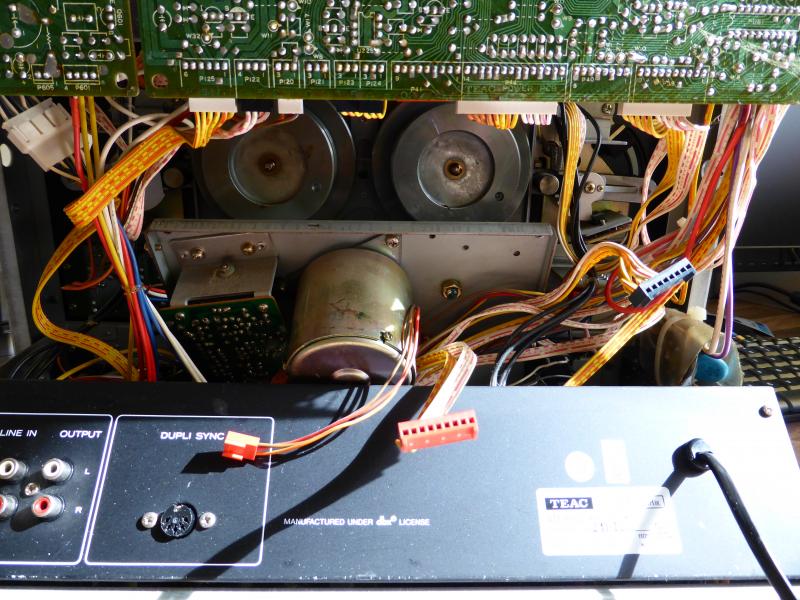
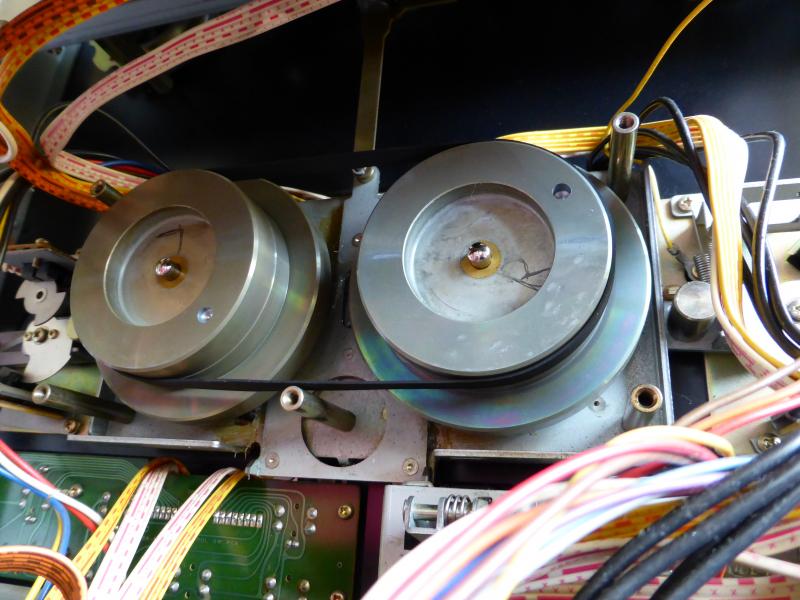
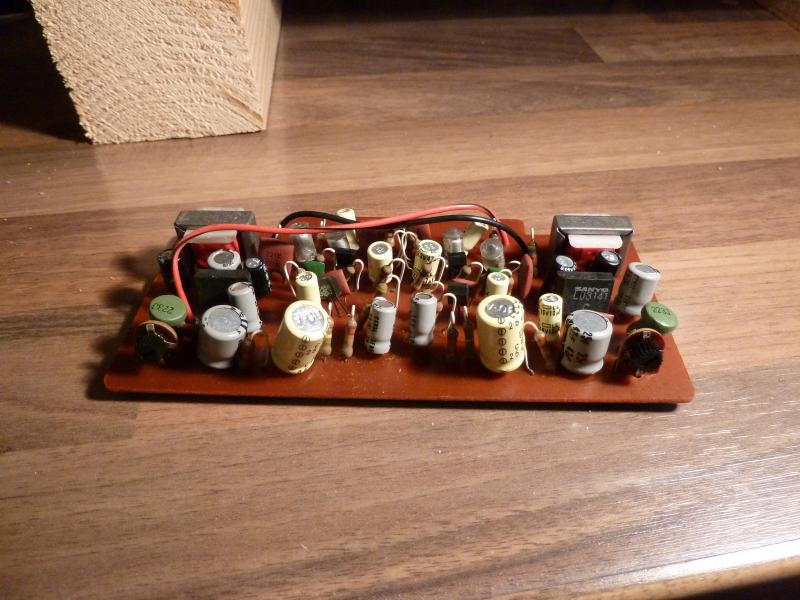
Eindelijk uitgebouwd. De 2 vliegwielen in de achtergrond:


De 2 vliegwielen verwijderen. Goed links en rechts uit elkaar houden.


Overigens viel me meteen op het grote verschil tussen de snaren: de oude is een stuk langer dan de nieuwe. Dus of de oude was wat uitgerekt, ondanks dat het rubber nog vers aanvoelde, of de nieuwe is ietsje te krap. Of allebei.

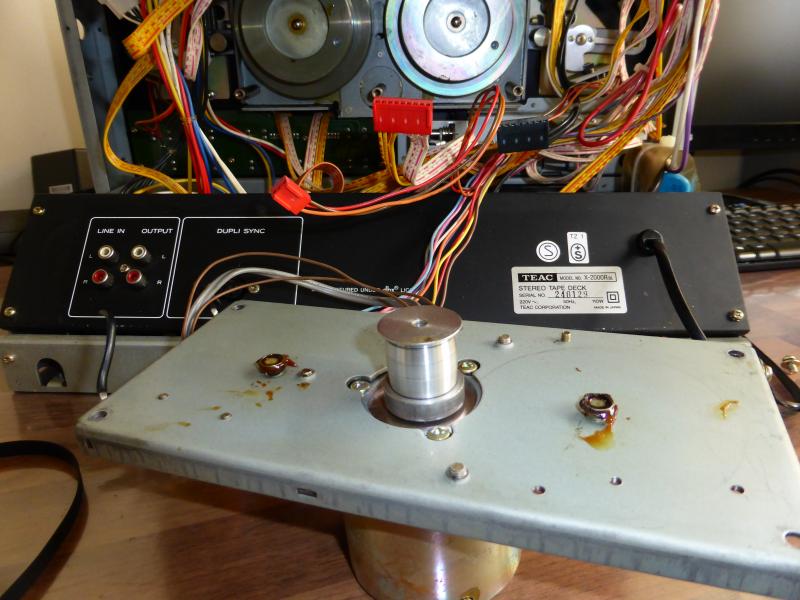
Toen heb ik alles losgehaald en schoongemaakt en opnieuw gesmeerd: de vliegwielen, de aandrukrollen en het aandruk mechanisme. Oud vet verwijderd, nieuw vet er op. 

Alles zeer grondig schoongemaakt. Vliegwielen er weer op, meteen de washers aan de voorkant weer over de capstans gedaan. Nieuwe snaar er op:


En toen alles in omgekeerde volgorde weer vast. Het was een beetje pielen om de snaar weer over de motor te krijgen, maar het ging uiteindelijk wel. Als laatste de print weer laten zakken en vastgezet.

====== END OF DUTCH TEXT ======

Unfortunately this was not the solution that fixed it completely, although the situation improved a bit. Even increasing the tape tension to incredible heights (or incredible lows) did not fix it. So I went online to find a solution.

Several fora messages suggested that everything in the tape path was relevant to my problem. From tape guides, to the rubber idle rollers, to lubrication of the tension rollers, to the state of the rubber of the pinch rollers. From the tape tension to the smoothness of the tape in question. It seems that everything was related to weather the dual capstan principle would function correctly.
So I soaked the pinch rollers in detergent for one night. The rubber was much softer and grippier after that treatment. Again, a little improvement, but no permanent fix.
I switched the pinch rollers from left to right, to see if that would improve the situation. No way.
I lubricated all the moving parts, I installed the little O-rings that were required for the rollers to function correctly (expensive little buggers!). Still there was no definitive solution that worked all the time.

Meeting

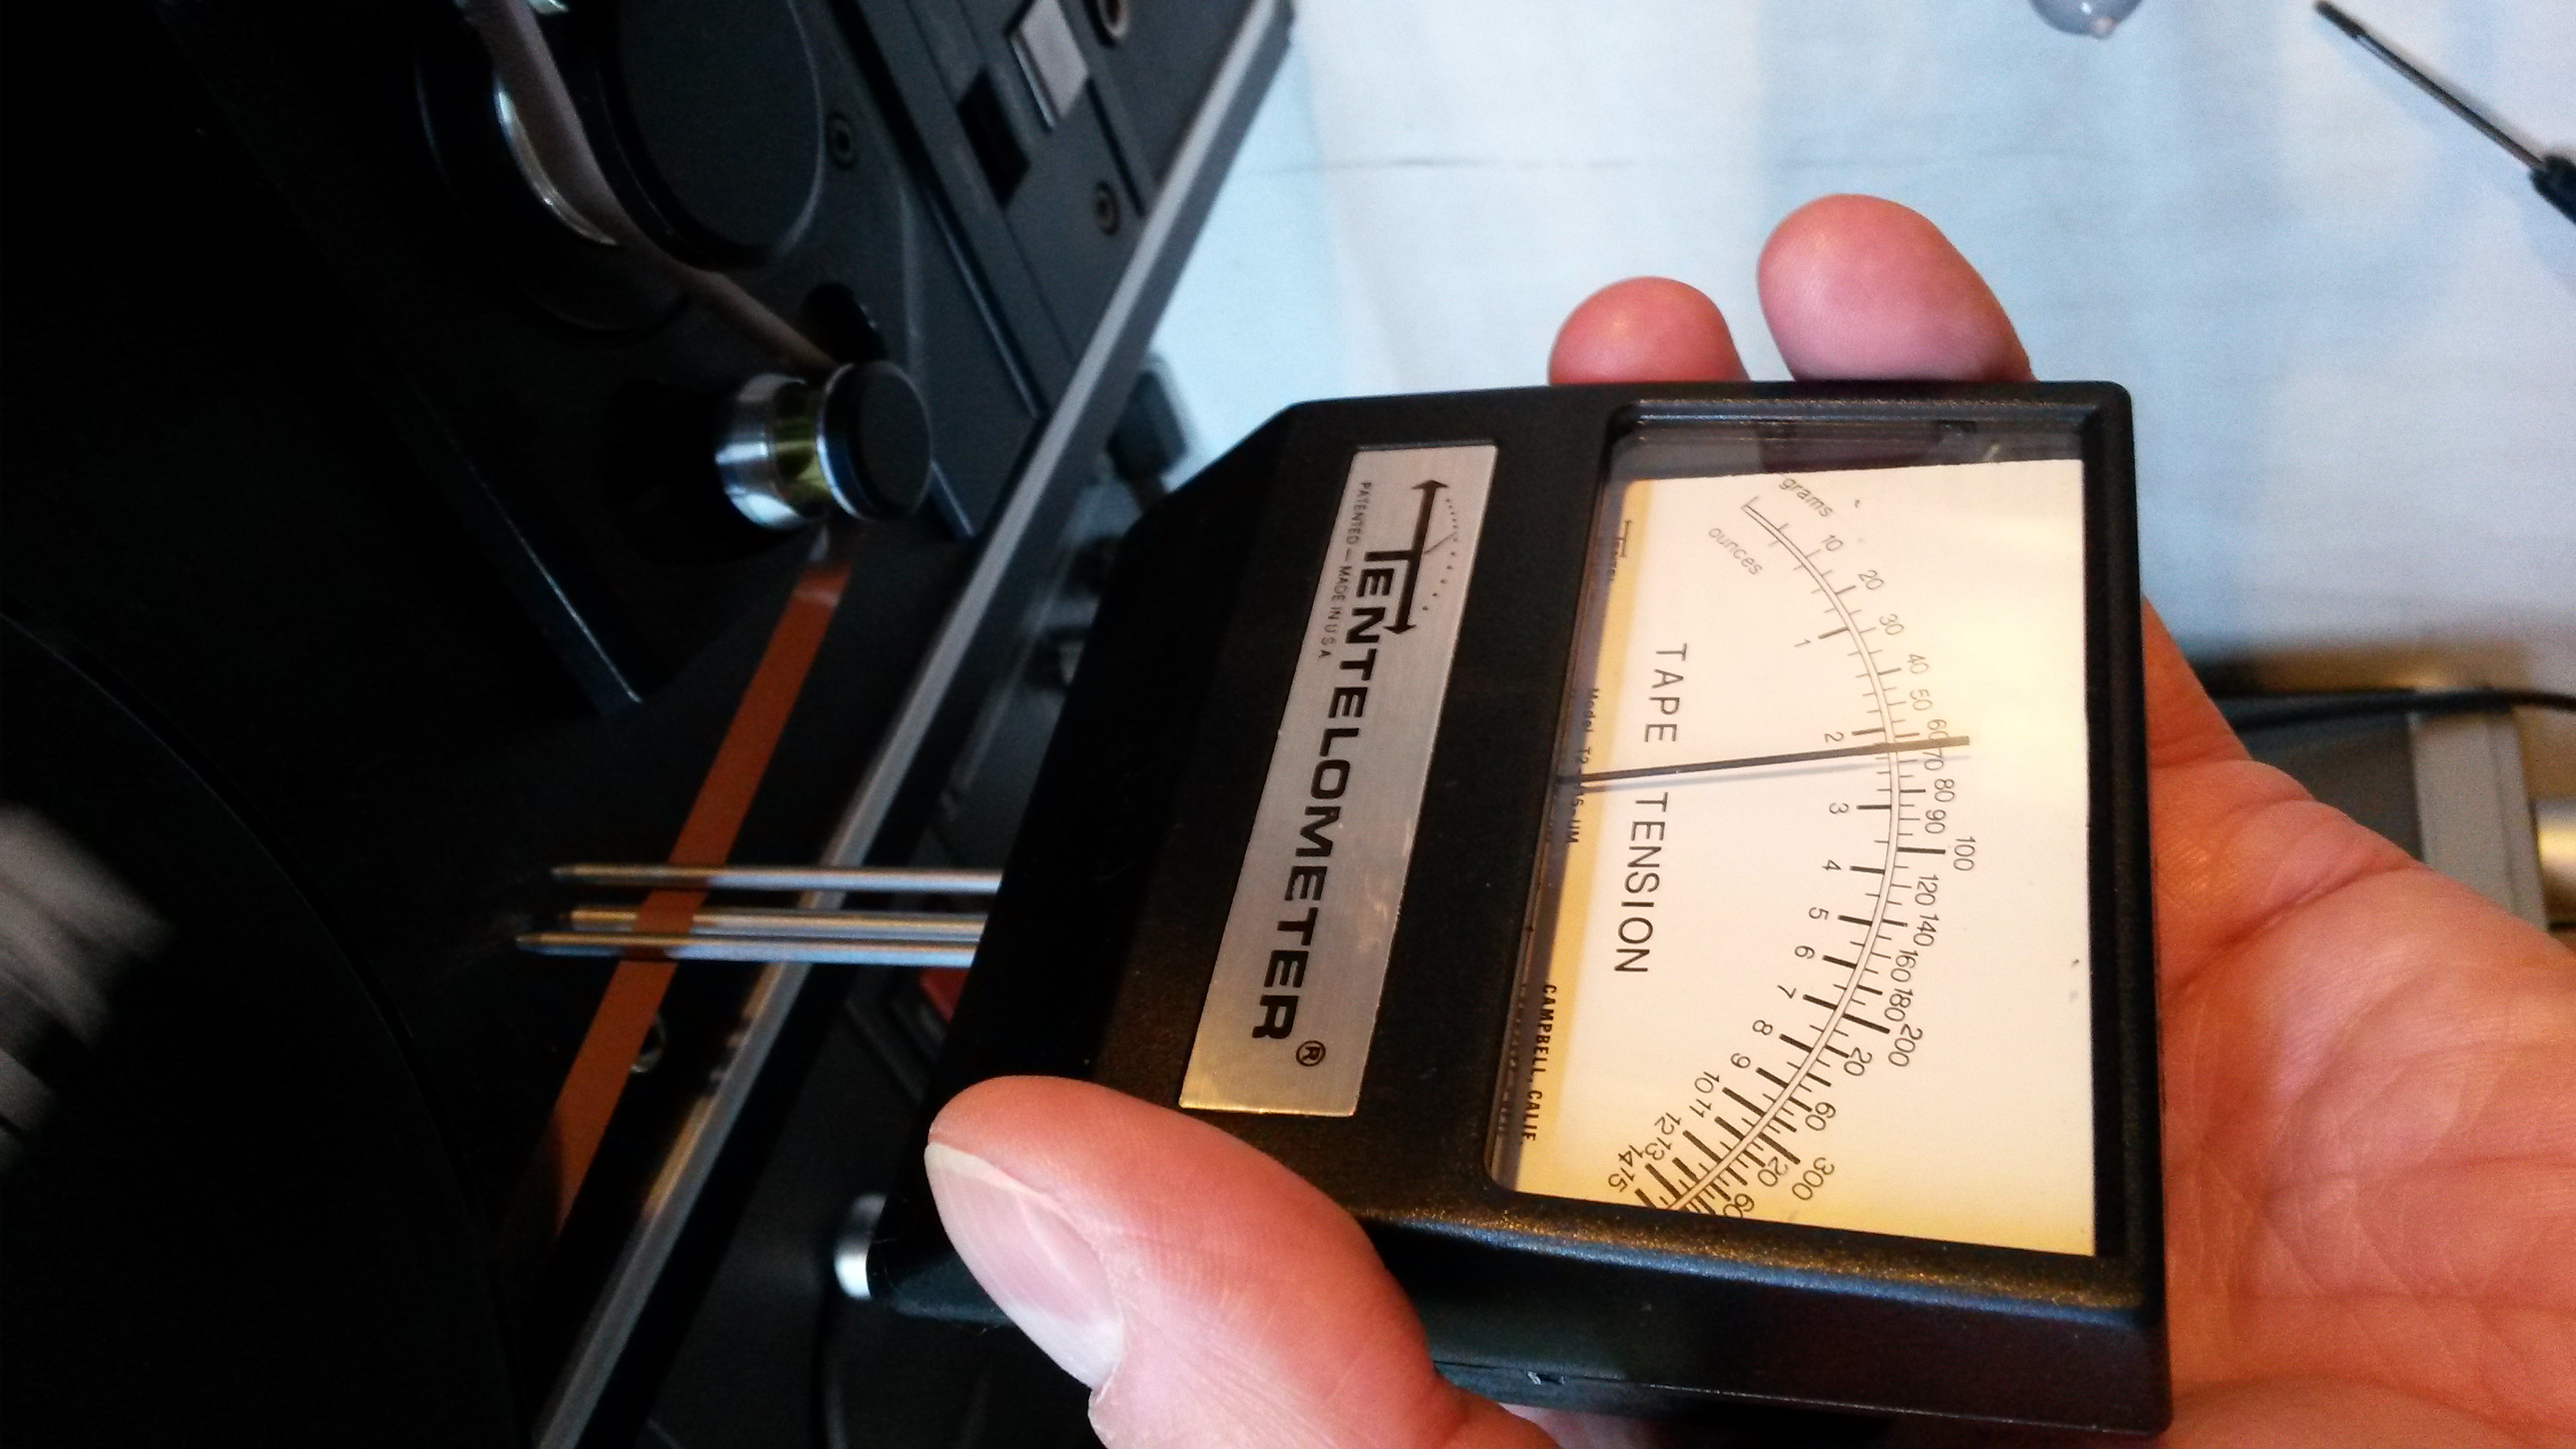
In April I went to a meeting of fellow tape deck enthusiasts where there was an opportunity to work on decks. I tagged the deck along, and fortunately there was an expert who was willing to take a look at the Teac. Immediately he found one problem: I had put the tape tension way too high. We measured more than 100 gr. when 50 was required. He used a Tentelometer, a very rare instrument which he posesses. It looks like this:

After we adjusted the tension to 50 grams, the tape handling was still not good. In fact, it was worse. Then, the guy helping me thought the problem might be in the capstan motor, of which the carbon brushes would have degraded over the years resulting in less powerful drive. So, on the fly he opened the capstan motor, removed the old brushes and (he had them available) installed new ones.20140412_145008 20140412_144659
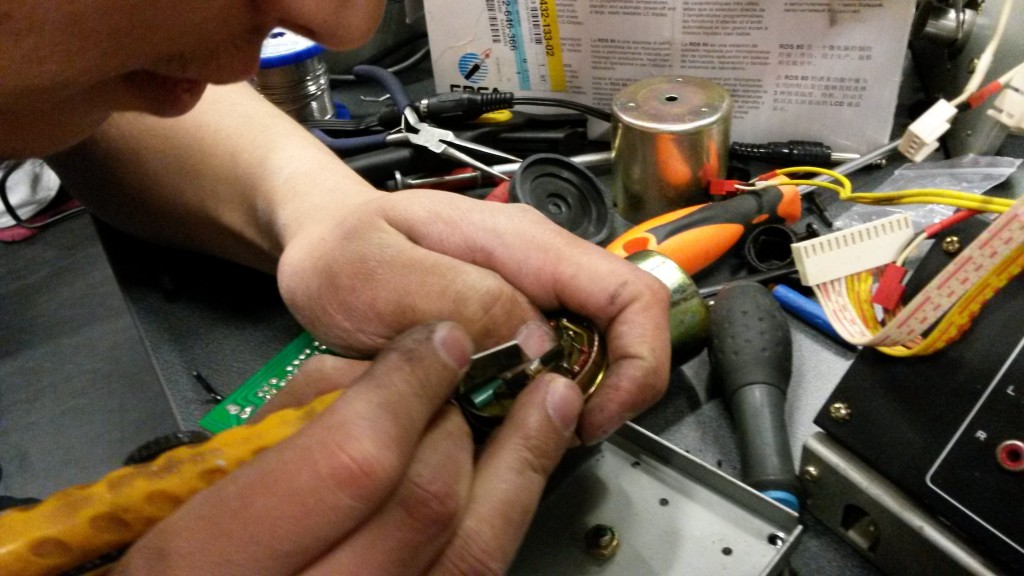
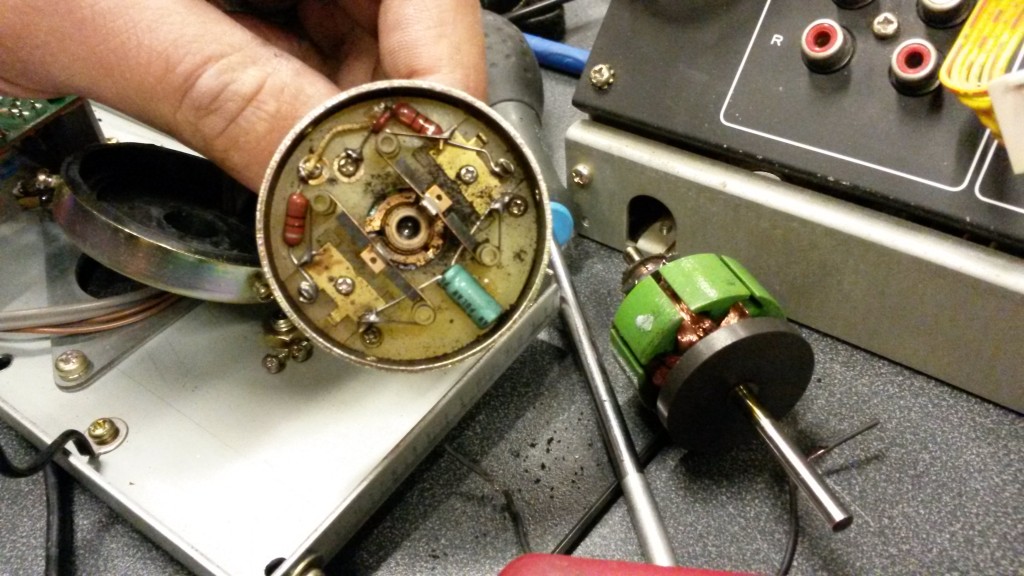
After this, still no good. But I had new carbon brushes! Jeey!

At the meeting we came to the conclusion that maybe the new belt I had put in was not an original Teac spare part but a fake. So I went to an official Teac repair center and got myself an original Teac approved belt. After I installed that belt, still not any better. Grrrr.

The solution!

Eventually, as a sort of last resort, I took the Service Manual and went through all the mechanical adjustments mentioned there. Some I could do, some I couldn’t. For instance, I haven’t got a spring scale necessary to measure torque. And then, finally, after I adjusted the pinch roller pressure to a much lower value, it suddenly all seemed to come together.
When I adjusted for a very, very low pressure of the pinch rollers on the capstans, even to the extend that I could very easily stop the tape when playing, the tape would indeed run fine along the heads and reverse play was no problem. So I adjusted for a little more pressure but anyway now it works great and I haven’t got any more tape issues.

Great sound

After that, I planned to calibrate the deck. This also proved to be not as easy as I thought. The service manual mentions a lot of steps and I think I did them all 4 or 5 times. The problem was that the record calibration required EE or Chrome tape, which I did not have. Fortunately I could borrow a Maxell XLII tape from a friend.
Bu after I calibrated the deck using the EE tape, it did not sound good. The level was way too low. And when I recorded at a higher level, the amount of distortion was unbearable. Something was not right here. After advice given to me on my favorite forum, I used normal tape to do the calibration. It still wasn’t to my expectation. I’m not sure what fixed it, but I repeated the calibration procedure several times, and after that I found the recording to be very good!

EE (chrome) tape

So the deck was performing as it should, reversing as it should, handling tape as it should and now I was to test it with EE tape and with the dbx noise reduction and dynamic expander on.
The result was, well, as close tot the original sound as you can hope for. The high tones were beautiful, and the sound was quiet as a CD. Out of nowhere the music starts. This is tape technology at it’s finest. I am very happy with my new tape deck.
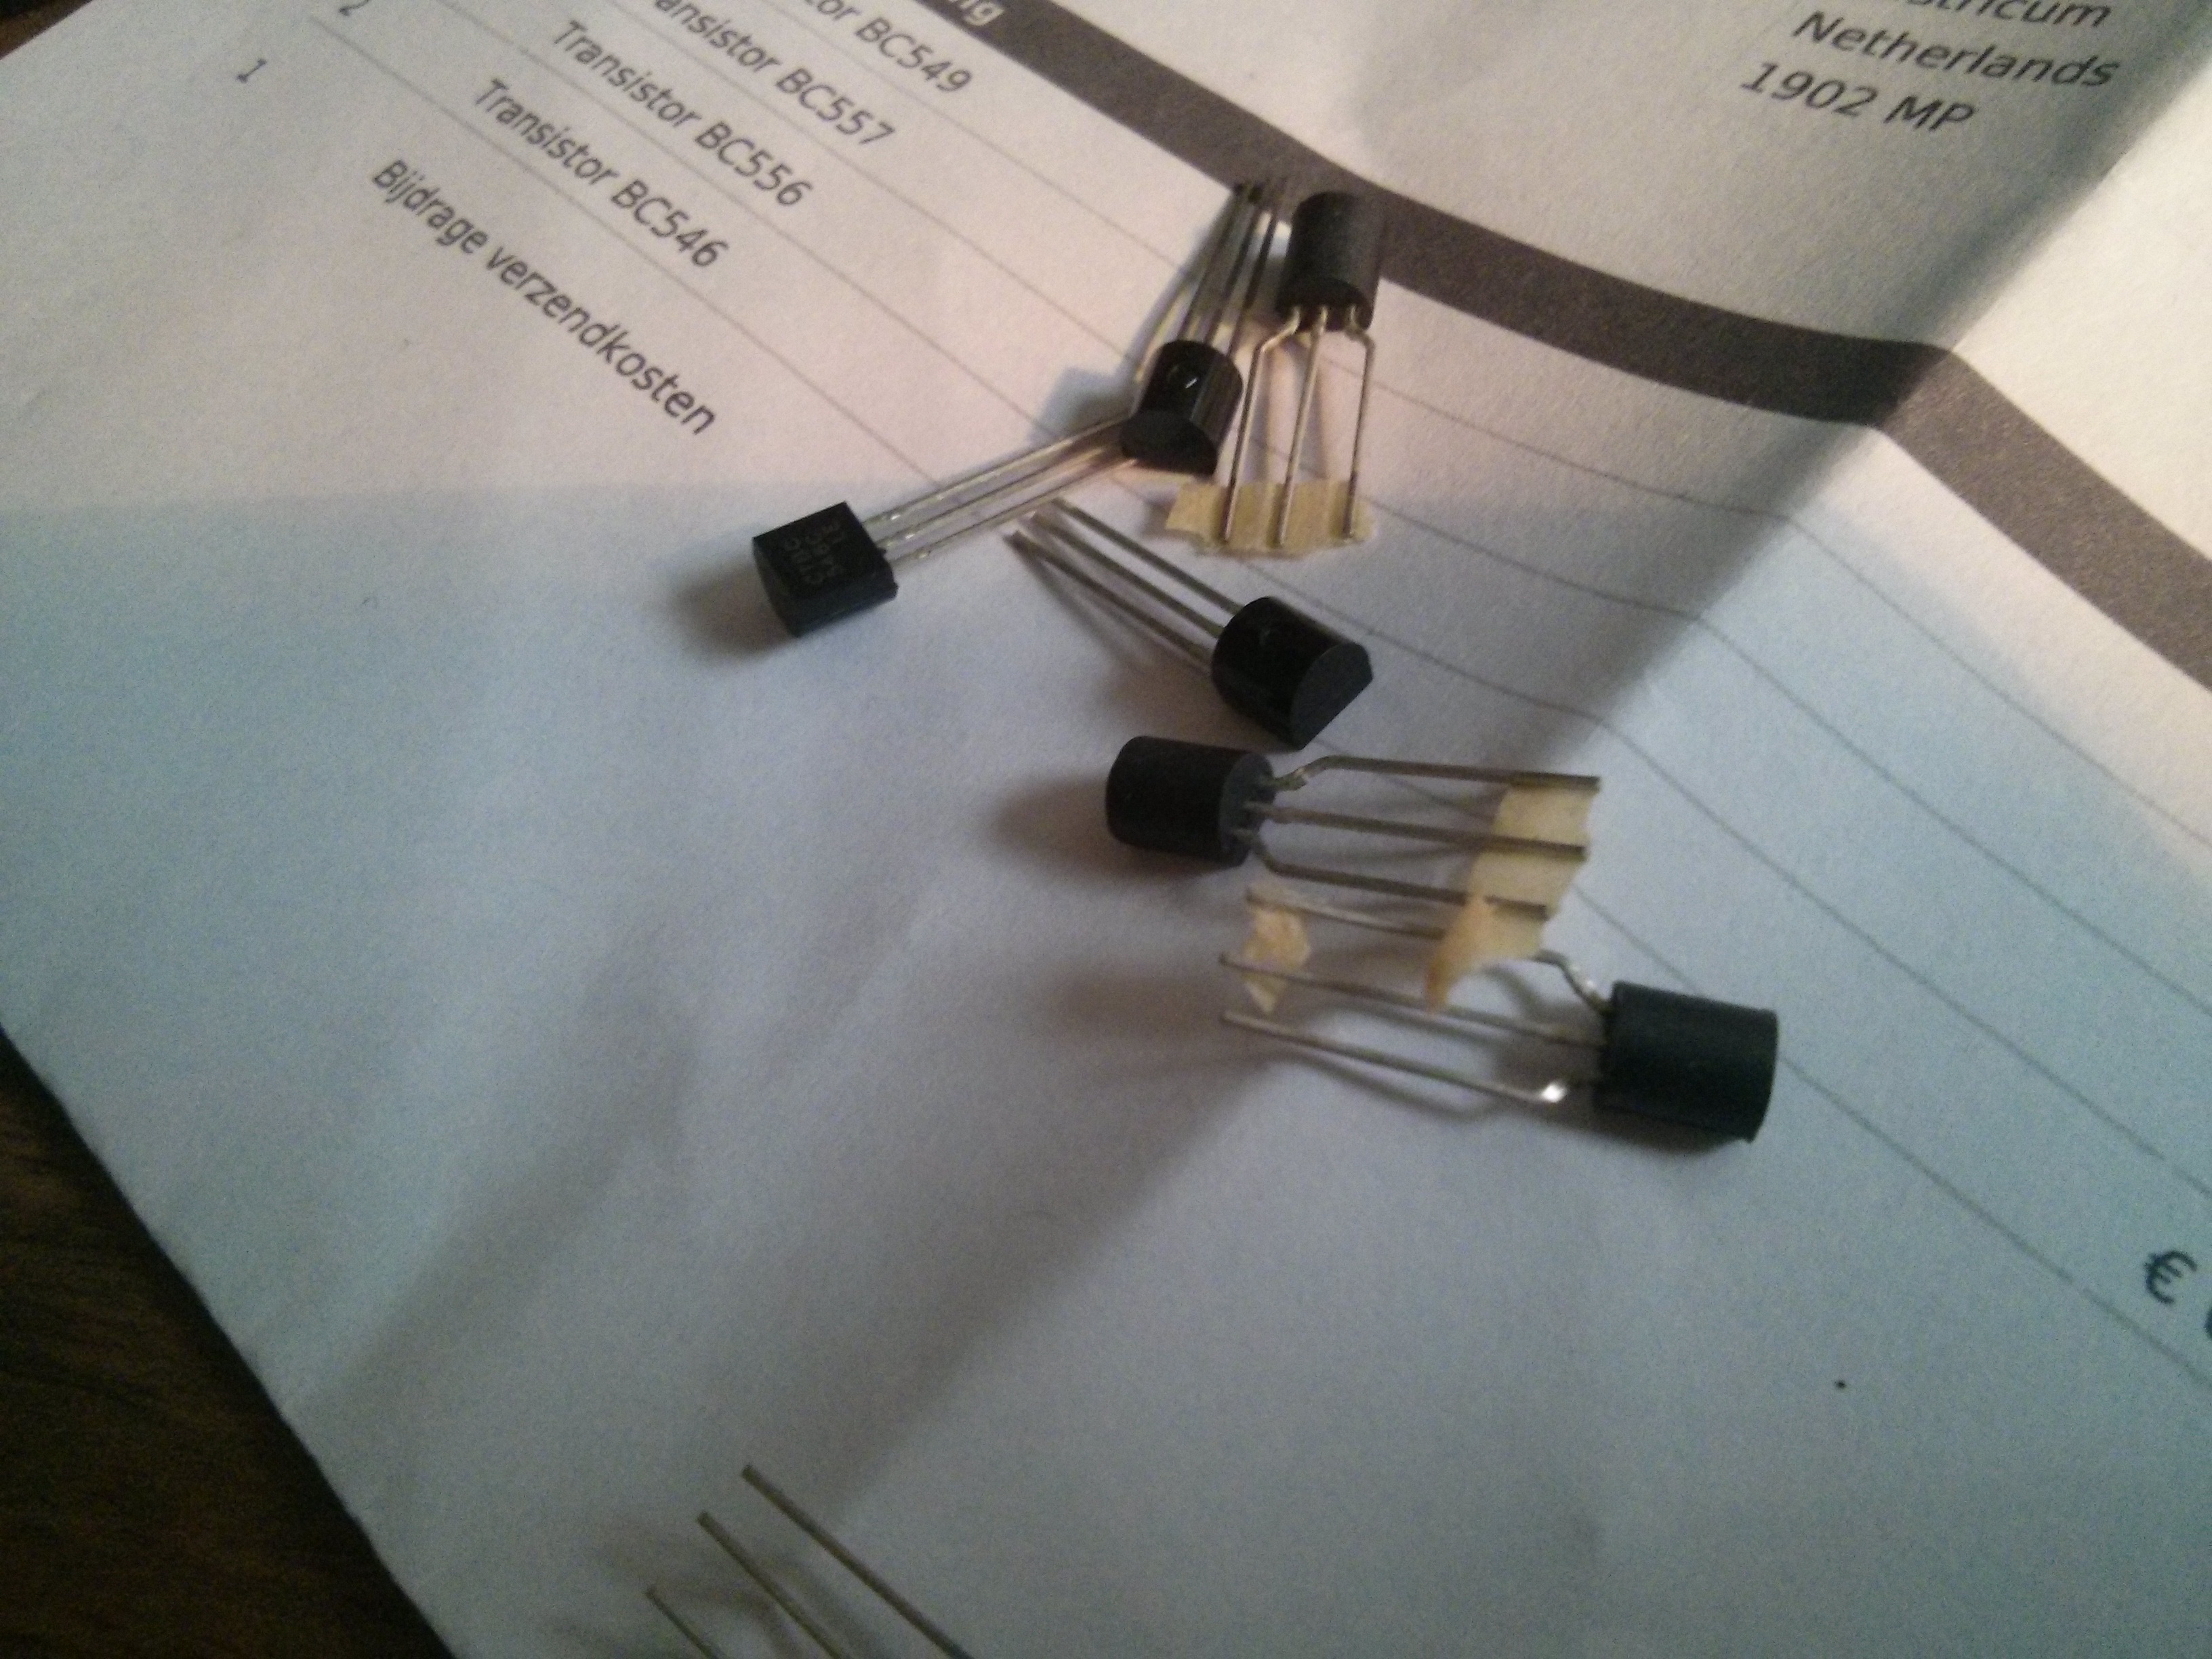
17 thoughts on “A problematic Teac X-2000R

  1. Michael Brenann

    Hello, In this report on your Teac X-2000R issues you mention that a friend had and installed new brushes in your capstan motor. I was under the impression that those brushes were not available so I would greatly appreciate it if you could tell me where they can be obtained. Thanks and best regards, Mike

    Reply
  2. Jaap Kroesschell

    Beste Philip,

    Dank voor het delen van je kennis en ervaring. Ik heb je blogs met veel plezier gelezen, en veel geleerd. Ik heb zelf recentelijk een bandrecorder aangeschaft, en verheug me erop ermee aan de slag te gaan komende zomer. Je schreef over een bandrecoder gebruikers / enthousiastelingen group, zou je me hier een link van kunnen doorsturen? Ik heb nl. (nog) geen calibratie tape, en andere tools. Misschien kan ik via die club iemand vinden die een calibratie band voor me kan maken op een gecalibreerde machine (ik ben immers een amateur, geen pro).
    Blijf vooral vloggen/bloggen!

    Met vriendelijke groet,
    Jaap

    Reply
  3. Alain Deneef

    Hello, do you have a source for these carbon brushes in the capstan motor? Did this person remove and replace the carbon pad only (how do you attach the new carbons?), or the complete assembly with the copper spring blades?
    Thanks,
    Alain Deneef

    Reply
    1. Philip van der Matten Post author

      Alain,

      The friend had made the new brushes himself, by filing a larger piece that he had obtained somewhere so that it would fit in the motor. So it was just 2 very small pieces of carbon that were installed into the copper tabs. They are held in place by the tension.

      Reply
  4. Jere Brewer

    My Teac X2000R has the same problem as described, especially in reverse play. I have the service manual and just to understand correctly what you did, there is an adjustment to the pinch roller pressure stroke adjustment nut. Is this what you adjusted to fix the problem? The manual says to adjust to 1.0 mm clearance between the pin and stopper cushion. Did you adjust to this clearance or just adjust to lesson the overall pressure? There is another section that is titled pinch roller pressure measurement but it only describes how to measure the pinch roller pressure and says if it’s not in the specified range you must replace defective parts, there are no adjustable parts. So, I just wanted to get clarity as to what you adjusted, hoping that I can fix my tape deck’s problem as well. Thanks.

    Reply
    1. Philip van der Matten Post author

      Hello Jere,

      This blog I have written many, many moons ago and since then I have fixed a lot of other devices. So, I can not recollect what I did exactly, but I can tell you that indeed the nut on the top of the deck was the solution. I think I recall that I adjusted it for a setting in the lower part of the ‘pressure-scale’ :), you just try that.
      I think that makes sense because the pulling capstan should be able to pull the tape to the point where it is tight between the 2 capstans. It works in unison with the forward tension. And if the pinch roller pressure is too tight, it won’t be albe to do that.
      Hope that helps a bit. Just keep following the SM to the letter, and try some setting, eventually it will work. But remember ALL the components need to be in good working order. It is NOT just 1 thing that fixes it.
      Good luck.
      -Philip.

      Reply
  5. Jere Brewer

    Hi Phillip,

    Thanks for the fast reply. I am going to give the adjustment a try and see what happens. So glad to find your website while researching the problem. I too have already tried various remedies but with no success and it only does this in reverse play, no problem at all in forward play. On a bit of a different subject what is your opinion on replacing all electrolytic capacitors in a tape deck? My X2000R is probably my youngest tape deck and my oldest is probably fifty years old. The oldest one, I did recap and really can’t tell any difference in the performance of the deck, but every capacitor I took out showed much higher capacitance , on the capacitor meter, than what it should be. Also, it’s very time consuming to replace them all, I spent maybe a month working off and on when I had time. Some guys say if it’s not broke don’t fix it, while others say it’s a ticking time bomb to leave the old capacitors in there. Just wondering what your thoughts are on the subject. Thanks again for your help, and I will let you know if the adjustment helps fix the problem.

    Reply
    1. Philip van der Matten Post author

      Jere,

      Glad you like my blog.
      Please check http://www.tapeheads.net/showthread.php?t=43728 as well, lots of good info there.
      About the caps: I am not an authority on electronics, far from that, but there is truth in both views, as always. I could not agree with you more that it is very time consuming, and the fact that most values are off when you check. One sometimes wonders how it could operate at all.
      I usually let the internet speak: some models are known for their bad caps, or other problems, and that is then well documented in the community. So I foloow that.
      Fun fact: I have replaced caps in a 4-channel amplifier from ’74, but only on 3 channels. Replaced the transistors also. All with new good parts. Then I measured the thing: nothing I could distinguish channel 1-3 from 4. So what was all the trouble for? Maybe the ticking timebomb thingy. Anyway, I had fun.

      Reply
  6. Rob Rivet

    Is there a place I can bring my X-2000R rather than try to fix it myself? Somewhere in the metro-Boston area?
    I am somewhat handy with most mechanical things but electronics require a gift I do not possess.

    Reply
    1. Philip

      Rob,

      What is the problem? Sometimes it is easier to fix than you think.
      Best is to try the tapeheads forum, http://www.tapeheads.net/forumdisplay.php?f=4 , which is full of the most experienced people willing to help.
      You can browse through the posts or search in them and you should probably find a member in that area. If not, you can always make a new thread describing in detail the exact problem you experience with your recorder, and then the experts will jump in and help you eitherway.

      Good luck!

      Reply
  7. Johan

    Nou Ik wilde er net een kopen ik blijf lekker bij de robuuste a 3300 serie. Ja ik moet zelf de de spoelen omdraaien is ook wel weer leuk om te doen.

    MVG Johan

    Reply
  8. Spencer

    If the tape is drooping in only one play direction, it is critical that you observe the belt in operation– it should run on the ridge of one capstan pulley and the flat of the other in one direction, and when the play direction is reversed, the belt must shuttle on to the opposite ridge and flat. This creates a slight difference in speed of the capstans ensuring tape tension on the heads. There are a couple of reasons the belt might not shuttle– wrong size belt, either length or width. Also, there is a certain amount of play that is required in the capstans, which is adjusted with the nut and bolt on the thrust plate (the end of the capstan sits in the bearing on the other side of this bolt). If the clearance is too tight on one or both capstans the belt will not shuttle.

    If the tape droops in both directions, the capstans may have been reinstalled on the wrong side.

    Reply
  9. ASIM MASOOD BUTT

    HELLO MY SELF ASIM MASOOD BUTT FROM AZIZ JEHAN BEGUM TRUST FOR THE BLIND WE HAVE TWO SET OF TEAC 2000 R BUT UNFORTUNATILY BOTH SYSTEM CAPTION MOTOR BELT ARE BRITALE AND NOT AVAILABLE IN LAHORE PAKISTAN SO TELL ME CAN YOU ARRANGE IF YES SO HOW TO PROCEED FOR THIS MATTER
    REGARDS
    ASIM MASOOD BUTT
    +923004255113

    Reply
  10. ASIM MASOOD BUTT

    HELLO MY NAME IS ASIM MASOOD BUTT I REPRESNT AZIZ JEHAN BEGUM TRUST FOR THE BLIND AND WE USE TEAC 2000 R SPOOL TAPE RECORDER BUT UNFORTUNATLY BOTH SYSTEM CAPTION MOTOR BELT IS BRITTLE AND NOT AVAILABLE IN LAHORE PAKISTAN SO CAN YOU ARRANGE IF YES SO TELL ME HOW TO PROCEED
    REGARD
    ASIM BUTT
    +90-300-4255113

    Reply

Leave a Reply

Your email address will not be published. Required fields are marked *

Installing new Ortofon 2m red cartridge in the Technics SL-1900

Yesterday I received my new cartridge: the Ortofon 2m red. It came with a brush, some screws and a little screwdriver. All in the package for €84,-

2M Red Verso hifisiteI couldn’t wait for a day off to try it so I installed it yesterday evening. I have never before installed a cartridge, and I must admit the thought of doing so was a bit daunting.

I had read a lot about installing and adjusting phono cartridges in the past few weeks so I understood the basics. I had downloaded the Technics protractor from vinylengine.com, printed it and checked the scale of the print. But now it was time to put the theory into practice.

headshell_old

My old-style head shell

I soon realized that this new cartridge wouldn’t fit in the headshell I had designated for it. This is an old style Technics head shell with one screw on the top.

Although only one screw is visible in the picture, it has an additional mounting bracket underneath that should fit the 2 screws necessary to mount normal cartridges. But my Ortofon needs to have the heads of the screws on the topside and that is not supported in this headshell.

But fortunately I have two headshells, the other one is the newer type which has the normal two screwholes at the top. Using the screws which were provided in the package I was able to quickly attach the cartridge provisionally to the headshell.


new style headshell

new style headshell

So that was fairly easy. Next was the task of adjusting the ‘contraption’ 😀 I took my protractor and put it on the turntable on top of a record.

I soon learned that when I moved the cartridge all the way to the front of the shell that the needle followed the ‘arc’ on the protractor perfectly. Yes!

IMG_20131219_212926

using the protractor

But when I tested the alignment of the cartridge on the two gridline patterns on the protractor, I found that it was not perfect in line. So I adjusted it very slightly to the point that it was in line on both patterns and then secured the screws. Pfew! Job done!


yes-90125

Yes – 90125


Then came the testing. I must admit I was a little but afraid, or better anxious. I tried it out with a record from Yes – 90125.

I put the needle down very very carefully.

I put on my headphones.

But as soon as the first tones from the song (Owner Of A Lonely Heart) were played, I relaxed. It sounded very very good!

IMG_20131219_212756

The Ortofon happily playing in my sl-1900

There is a lot of definition in the sound. There is also a lot of ‘punch’, which I like. HF tones are also ok. Bass is tight and well defined. Overall, I have never ever heard a record sound so clear. True, in the past I have not had good quality turntables. In fact, they were rubbish. But I never thought a record could sound like this. It is so close to a CD. I’m also very glad that I treated my records carefully in the past, I didn’t play them a lot (I immediately recorded them onto tape) so that I now have old, but ‘like new’ records that sound wonderful!

I continued to listen to albums from ELO, Marillion, Tchaikovsky and 12-inch’s from Chaka Khan, Unique (What I Got IS What You Need). Those were the first records I found for grabs. It was a good experience. I am pleased. In the coming evenings I will listen to some other albums.

I was surprised how quickly and how easily an inexperienced person like myself could do this task. It took me a little over an hour including the adjustments. I can recommend it to everyone.

Coming up next: cleaning the records with a LP cleaner

7 thoughts on “Installing new Ortofon 2m red cartridge in the Technics SL-1900

  1. Pingback: New arrival: Technics SL-1900 turntable | Tapehead

  2. Pingback: New arrival: Technics SL-1900 turntable | www.reeltoreel.nl

  3. Joel Turner

    The picture at the top of your post is for the 2M Red Verso (bottom mount model). But it looks what you have installed is the standard 2M Red (top mount).
    I have the same turntable and bought the 2M Red and am wondering if the Verso would actually mount on the SL 1900 standard tone arm.
    Alternatively, I’ll need to go down the path you did, which is to use a top-mount headshell.
    Can you let me know which cartridge you actually used?

    Reply

Leave a Reply

Your email address will not be published. Required fields are marked *

New arrival: Technics SL-1900 turntable

This week I picked up a Technics SL-1900 turntable

1900

Technics SL-1900 (image borrowed from internet)

I was actually looking for a more high end model, like the Technics SL-1600Mk2, SL-1700Mk2, 1800Mk2 or even an SL-5300. But, those are hard to find, and when found, are very expensive and could cost more than €200,-. I found a very inexpensive SL-1900. It still had the original Technics 270 cartridge installed. And it came with an additional 270 cartridge without a needle. So I thought ‘oh, what the heck’, and I went to get it.

I was not disappointed. Not at all. In fact, I was very impressed. For the last years I have used a Dual cs-607, so that was my reference. And although the Dual has more definition, this one is more agreeable to listen to because….well, it has less definition. It doesn’t reveal all the noises and scratches and clicks and pops from the record so much as the Dual does. Compared to the Dual it lacks highs though.

UPDATE:

Please read the next post on how I installed an Ortofon Red cartridge in this turntable. https://www.reeltoreel.nl/blog/?p=364

Some information from internet:

Description

The Technics SL-1900 is a 2-speed, direct-drive turntable with fully automatic single disc playback. A one-chip IC, incorporating 321 elements, controls motor speed for superb accuracy with servo control. The tonearm mechanism gives convenient automatic set-down, lift-off and stop. Memo-repeat control permits up to six repeated plays of the record, or continuous play. The heavy monolithic bas and isolator system protects against external vibrations. The SL-1900 comes complete with an EPC-270C-II moving magnet phono cartridge.

Some specs:

  • Brand: Technics
  • Model: SL-1900
  • Manufacturing year: 1977
  • Made in: Japan
  • Colour: Braun
  • Power: 4,5 Watt
  • Dimensions: 137 x 430 x 334mm
  • Weight: 7,2 kg
  • Original price ca.: $400,-
  • Direct Drive
  • Fully automatic operation
  • Platter: 310mm aluminium diecast
  • Speeds: 33 and 45rpm
  • Wow and flutter: 0.03% WRMS
  • Rumble: -73dB
  • Tonearm: universal, static balanced
  • Effective length: 230mm
  • Overhang: 15mm

und auf Deutsch:

Technische Daten

  • Antrieb: Direktantrieb
  • Motor: Gegenelektromotorische-Kraftfrequenz-Generator Servo Gleichstrommotor
  • Drehzahl: 33 1/3 und 45 U/min
  • Gleichlaufschwankungen: 0,03% WRMS (JIS C5521), ±0,042% bewertet Null-zu-Spitze (DIN 45507)
  • Rumpelgeräuschabstand:
    • DIN 45539A: 50 dB
    • DIN 45539B: 73 dB
  • Plattenteller: Aluminium-Spritzguss, 310 mm
  • Betriebsart: Automatisch oder manuell
  • Pitch: ±5%
  • Tonarm: Rohrarm, statisch balanciert
    • Nadelauflage: 0 – 3 g
    • effektive Achslänge: 230 mm
    • Überhang: 15 mm
    • Kröpfungswinkel: 21,5°
    • Reibung: 7mg (horizontal und vertikal)
    • Spurfehlwinkel: Innerhalb + 3 (145mm vom Mittelpunkt), + 1 (55mm von Mittelpunkt)
    • Gewichtsbereich für Tonabnehmer: 5,5 – 9,5 g
    • Gewicht des Tonarmkopfes: 9,5 g
  • Tonabnehmer: Technics EPC-270 C-II (MM)

Besondere Ausstattungen

  • Aufsetztpunkt: Einstellbar für 12″,10″ und 7″ Schallplatten
  • Memo-Repeat: wiederholtes Abspielen von ein- bis sechsmal, oder dauernd wiederholendes Abspielen einstellbar
  • Schwergewichts-design: Schweres Polymer-Unterchassis auf Viscoelastisch gedämpften Stahlfedern
  • Motor-Rotor ist direkt mit dem Plattenteller verbunden (war damals von Technics entwickelt worden)
  • Elektronisch gesteuert mit damals revolutionärem One-Chip-IC AN 630
  • hochempfindlicher Tonarm mit Kardan-Aufhängung in Präzisionszapfenlagern. Damals ebenso aussergewöhnlich.
  • Viscogedämpfte Tonarmsteuerung und Anti-skating – damals ein Novum ebenso wie die dicken, kapazitätsarmen Phonokabel.

Information about the cartidge:

Allgemein

  • Hersteller: Technics
  • Modell: EPC-270C-II
  • Baujahre: zum 1976
  • Hergestellt in:
  • Farbe:
  • Gewicht: 6,0 g
  • Neupreis ca.:

Technische Daten

  • Prinzip: MM
  • Frequenzgang: 20 – 15.000 Hz (±2 dB)
  • Kanaltrennung:
  • Kanalbalance: 2 dB (1 kHz)
  • Übersprechdämpfung: 25 dB (1 kHz), 20 dB (10 kHz)
  • Ausgansspannung:
    • 1 kHz, Höchstamplitude: 3,2 mV
    • DIN 45500: 6,4 mV
  • Abschlusswiderstand: 47 kOhm – 100 kOhm
  • Induktion:
  • Nadeltyp: Diamant elliptisch
  • Empfohlene Auflagekraft: 1,75 ±0,25 g
  • Nadelnachgiebigkeit: 12x 10^-6 cm/dyn

2 thoughts on “New arrival: Technics SL-1900 turntable

Leave a Reply

Your email address will not be published. Required fields are marked *

Checking out dbx encoded discs (vinyl)

The other day I received two dbx encoded 7″ singles, demonstration discs by Technics. These are supposed to have superior dynamic range and almost no noise/hiss/rumble whatsoever.

IMG_20131203_151004

IMG_20131203_150842

IMG_20131203_150830

First some background:

dbx was also used on vinyl records, from 1973 until around 1982, and over 1100 albums were released with dbx encoding, which were known as dbx discs. When employed on LPs, the dbx Type-II system reduced the audibility of dust and scratches, reducing them to tiny pops and clicks (if they were audible at all) and also completely eliminated record surface noise. dbx encoded LPs had, in theory, a dynamic range of up to 120db.[3] In addition, dbx LPs were produced from only the original master tapes, with no copies being used, and pressed only on heavy, virgin vinyl. Most were released in limited quantities with premium pricing. [wikipedia][

Well, the accompanying sheet suggest that you hook your equipment up to a dbx capable (cassette) deck, but I didn’t. Instead, I connected my dbx model 150 unit. Better!

On all 4 sides was music, mostly jazz-like. On side A of the first disc was an impressive dynamic piece with flute and big drums. I was very surprised when the drums reached full power! And they go very loud! It is an extremely dynamic experience. Even on headphones.

Clicks and pops  and other vinyl noise are so unnoticeable, the whole listening experience is very, very enjoyable. Even the dropping of the needle was hardly audible. Now, I need to find me some other dbx encoded discs!

edit: while writing this down, I’m thinking about what would happen if I record this on a tapedeck with dbx encoding.
Or better: skip the decode and encode step, and record the disc as-it-is on tape, and the play it back through my dbx unit….interesting experiment. I should try that some time.

-Philip


5 thoughts on “Checking out dbx encoded discs (vinyl)

  1. Scott Strang

    I did actually try recording a dbx LP undecoded onto a cassette and decoded the tape on playback. It worked well as long as good blank ( hi bias or metal) cassettes were used. I worked at a radio station where we used dbx type2 on carts for music, liners, spots, jingles, etc for on air playback. I took a few of those carts and recorded them undecoded onto cassettes. I would then play them back on my home cassette with an outboard dbx type 2 unit and dumped them into my DAT machine. Some of the carts had dropouts and of course dbx exaggerated them. Overall they sounded pretty good.

    I also devoted dbx type 1 encoded tapes on my cassette deck and external unit and they sounded useable.

    Reply
  2. wangdidi

    I started collecting dbx vinyl records a few years ago and now have about 100. I used both unbalanced and balanced dbx decoder playback, and the listening effect was great! There is little information in this regard, and I hope to communicate with dbx ethylene record users.

    Reply
  3. Bacek

    DBX 150 is Type I noise reduction. For DBX Disc you need Type II decoder (like 12,122,124, 22, 222, 224, nx40)

    Reply

Leave a Reply

Your email address will not be published. Required fields are marked *

Solving famous cracking sound problem: replacing all transistors in mainboard Philips N4520

A few months after my purchase of the Philips N4520 tapedeck, it developed a nasty fault: during playback there would be cracking sounds coming through the music, or even when not playing at all. Also when touching the knobs, there would be pops and clicks.

An intensive internet search revealed that there were more decks affected with the same symptom. Fortunately, a remedy was also given: replace the transistors on the main circuit board with new ones. Gulp. All 19 of them.

I have some experience with soldering, but this was a completely new level for me. I happen to be in possession of a very good soldering station with temperature control, and I have used litz wire once or twice, to remove solder of the component you want to remove.

IMG_20131101_171351
IMG_20131101_171428

So, I ordered the necessary components on-line:

 7x BF245A : TS2 TS5/TS105 TS4/TS104 TS3/TS103
 1x BC547 : TS11
 4x BC548 : TS8 / TS108 TS9 / TS109
 2x BC549 : TS1/101
 1x BC557 : TS10
 2x BC546A : TS6/106
 2x BC556A : TS7/107
IMG_20131101_135434
My new friends

Total number of transistors: 19 pcs.
Total cost: around € 10,- excl. transport.

Then, the scary part started.

Taking apart the biggest monster in taperecorders known to mankind.

IMG_20131101_135115
IMG_20131101_135124

Well, almost. And, as I found out, the bottom part slides out fairly easy to the front. And it is connected to the rest of the machine with connectors. So in the end you have the bottom part which contains the ‘mainboard’ as I call it as a separate unit on your workbench.

Locating the components on the printboard was difficult, but doable. Then soldering started. Using the litze wire to remove the solder from the board, I was able to remove the components.

IMG_20131101_135219
Don’t shake!
IMG_20131101_171544
My old friends. Well, not my friends anymore!

Working methodically through all components, I replaced all 19 of them. Double-checked the joints for good contact. Cut away the excess pins. And I was left with this:Then it was time to test. To do that, the mainboard had to be reinserted into the recorder and reconnected.
And?

It worked! Yay! I now have a N4520 that plays back and records beautifully! It took about an afternoon’s work and about ten euro’s, but Then you have successfully restored a very very nice machine.

IMG_20131101_150513
The glorious Philips N4520 in action 

See a video of this beast in action on my YouTube channel:

Update 20210116: I also made a handy ‘layout quick reference guide’ for the audio main board (also better known as Panel 1) which comes in handy when you are troubleshooting or calibrating the deck.

Picture is below, you can download it here in PDF format.

20220415: Another updated version is here in PDF.
And here is a diagram of the faceplate. Also handy!

BETTER STLL: visit the Quick Reference Guide section of my website, for new and updated QRGs all the time.

https://www.reeltoreel.nl/QRG/

Sennheiser HD-600 review

Yesterday I finally got my brand new Sennheiser HD-600 headphones. They look amazing, but they sound incredible!

Sennheiser HD-600

Sennheiser HD-600 new in box

I can really recommend these to any audiofile out there!

One thought on “Sennheiser HD-600 review

  1. knoxville banners

    Hey there, I think your blog might be having browser compatibility issues.
    When I look at your blog in Firefox, it looks fine
    but when opening in Internet Explorer, it has some overlapping.

    I just wanted to give you a quick heads up! Other then that, awesome blog!

    Reply

Leave a Reply

Your email address will not be published. Required fields are marked *